To apply concealer with a sponge, dab the product onto the desired area and gently blend it in using a tapping motion. Welcome to the world of makeup!
Concealer is a great tool for covering blemishes, dark circles, and imperfections, and using a sponge to apply it can give you a flawless, natural-looking finish. Whether you’re a beginner or a makeup pro, learning the right technique for applying concealer with a sponge can elevate your makeup game.
We’ll walk you through the step-by-step process of using a sponge to apply concealer, highlight some tips and tricks for achieving a seamless blend, and recommend some products that can help you achieve the look you desire. With a few simple steps, you can master the art of concealer application and enhance your natural beauty. Let’s get started!
Contents
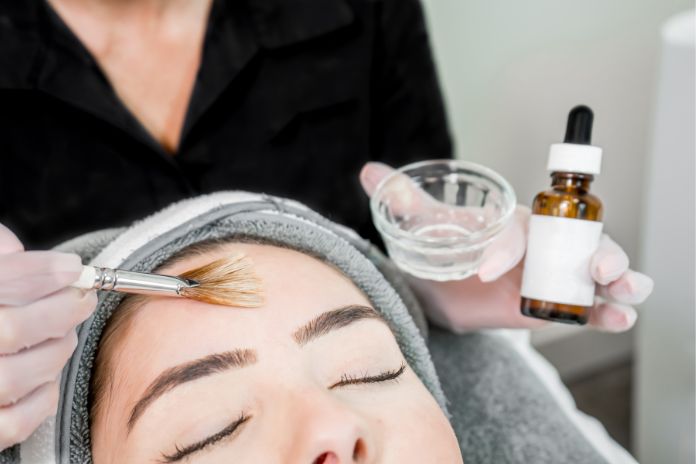
Choosing The Right Concealer And Sponge
Choosing the right concealer and sponge is key to achieving a flawless makeup look. Understanding different types of concealers and selecting the appropriate sponge can significantly impact the outcome of your makeup application. Let’s delve into how to choose the right concealer and sponge to achieve a seamless finish.
Understanding Different Types Of Concealers
Before diving into applying concealer with a sponge, it’s crucial to understand the various types of concealers available. Concealers come in different forms, including liquid, cream, stick, and pot concealers. Each type caters to different skin types and coverage needs, so it’s important to select the one that best suits your specific requirements.
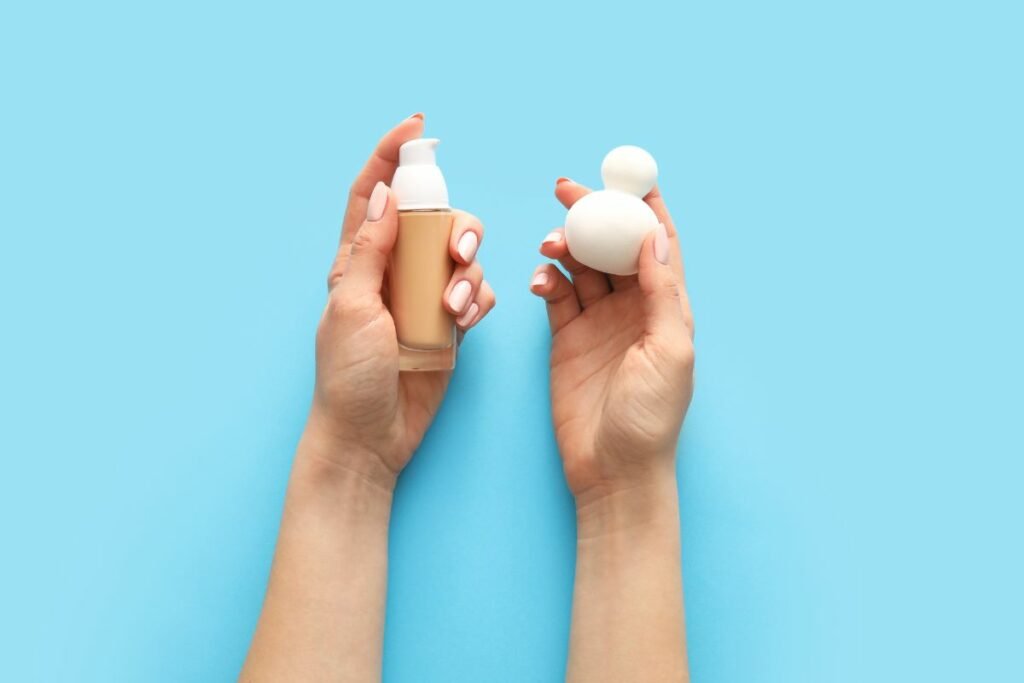
Selecting The Appropriate Sponge
Find the perfect sponge to pair with your concealer. Beauty sponges are available in various materials, shapes, and sizes. The popular ones include latex-free and microfiber sponges known for their seamless finish and natural look. When choosing a sponge, consider its texture, shape, and density to ensure smooth and efficient application of your concealer.
Preparing Your Skin
Preparing your skin is essential to achieve a flawless makeup look. Properly cleansing and moisturizing your skin, along with applying a primer, sets the foundation for a smooth and long-lasting makeup application.
Cleansing And Moisturizing
Before applying concealer with a sponge, it’s crucial to start with a clean canvas. Cleansing removes any dirt, oil, or makeup residue that may be on the skin, preventing it from interfering with the concealer’s application. After cleansing, moisturizing the skin helps to ensure it’s adequately hydrated, creating a smooth surface for the concealer. Use a light, non-greasy moisturizer suitable for your skin type to prevent the concealer from settling into fine lines and looking cakey.
Primer Application For Long-lasting Effect
To enhance the longevity and adhesion of the concealer, the use of a primer is beneficial. Applying a small amount of primer before the concealer helps to fill in fine lines, pores, and any texture on the skin, providing a smooth base for the concealer to adhere to. Additionally, the primer creates a barrier between the skin and the concealer, helping to prevent the concealer from creasing or fading throughout the day, ensuring a flawless finish.
Proper Application Technique
For flawless concealer application using a sponge, start by dabbing the product gently onto the areas that need coverage. Use a patting motion to blend the concealer seamlessly into the skin, ensuring even distribution and a natural finish. This technique delivers a smooth and flawless look while minimizing product wastage.
Dabbing Versus Swiping: The Best Approach
When applying concealer with a sponge, it’s essential to use the right technique to achieve a flawless result. Dabbing the sponge onto the skin is generally more effective than swiping. This method helps to build coverage gradually and prevents the product from being spread too thinly, ensuring a more even and natural-looking finish.
Blending For A Natural Finish
Proper blending is crucial to achieving a seamless and natural finish when using a sponge to apply concealer. Start by gently tapping the sponge over the concealed area to blend the product into the skin. This technique helps to avoid removing the product and ensures that the concealer is seamlessly integrated with the rest of the makeup, creating a flawless complexion.
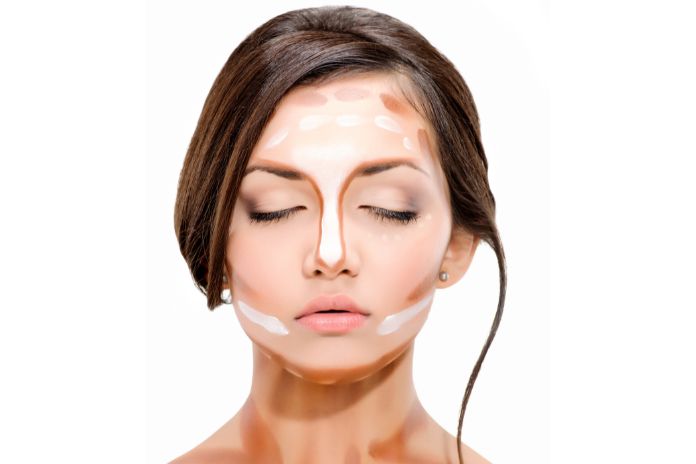
Concealing Different Areas
When it comes to applying concealer with a sponge, it’s essential to know how to properly conceal different areas of your face for a flawless finish. Understanding the specific techniques for different areas can help you achieve a natural and polished look. In this guide, we will look at how to effectively use a sponge to conceal under-eye circles, dark spots, redness, and blemishes.
Under-eye Circles And Dark Spots
To conceal under-eye circles and dark spots, begin by selecting a concealer shade that matches your skin tone. Dab small amounts of concealer onto the areas you want to conceal using the pointed tip of a makeup sponge. Then, gently blend the concealer by tapping the sponge in a stippling motion. This technique helps to achieve smooth and even coverage while avoiding excess product buildup.
Redness And Blemishes Coverage
If you are looking to cover redness and blemishes, opt for a green-tinted concealer to neutralize the redness. Apply the green concealer directly onto the affected areas using the tip of the sponge. Follow up by applying your regular skin tone concealer over the green concealer to match your skin tone. Blend the products seamlessly by gently tapping the sponge for a natural-looking finish that effectively conceals blemishes and redness.
Setting And Finishing Touches
When it comes to achieving a flawless complexion, applying concealer with a sponge can make a world of difference. Once you’ve covered imperfections and blemishes, it’s time to focus on setting and finishing touches to ensure your makeup stays in place throughout the day.
Setting The Concealer With Powder
After applying and blending your concealer with a sponge, the next step is to set it with a translucent powder. This helps to lock the product in place, prevent creasing, and provide a smooth, matte finish. When choosing a powder, opt for a finely milled formula that matches your skin tone to avoid a chalky appearance. Gently press the powder onto the concealed areas using a soft brush to ensure even coverage.
Optional Additional Steps For A Flawless Look
Once the concealer is set, you can take additional steps to enhance the overall finish of your makeup. Consider using a setting spray to seal the makeup, adding a subtle glow with a highlighting powder, or lightly blending a translucent setting powder all over the face to minimize any shine. These optional steps help to ensure a long-lasting and flawless look throughout the day.
Frequently Asked Questions
How Do I Choose The Right Concealer Shade?
Select a concealer shade that matches your skin tone for natural coverage and avoid over-highlighting or darkening the under-eye area.
What Type Of Sponge Works Best For Concealer Application?
Use a damp beauty sponge for a flawless, streak-free application, ensuring the product blends seamlessly into the skin.
Can I Use A Sponge For Spot Concealing?
Yes, a small, pointed sponge can precisely apply concealer to cover blemishes, discoloration, or other imperfections with ease and precision.
Should I Set My Concealer With Powder After Application?
Setting the concealer with a translucent powder can prolong its wear, prevent creasing, and maintain a smooth, matte finish throughout the day.
How Can I Clean My Concealer Sponge For Reuse?
Regularly cleanse the sponge with mild soap and warm water, gently squeezing out the makeup residue until the water runs clear, then air dry for hygienic re-use.
Conclusion
To sum up, mastering the art of applying concealer with a sponge can elevate your makeup game. By following the tips and techniques outlined in this blog post, you can achieve a flawless and natural finish. With practice and experimentation, you’ll find the best method that suits your preferences.
So, go ahead and enjoy the wonders of using a sponge for flawless concealer application.