Press-on nails used to be a punchline. They are not anymore.
The technology genuinely changed. Soft gel construction, better adhesives, and actual nail artists designing the sets mean you can get something that looks like a $95 salon appointment for under thirty dollars, apply it yourself in twenty minutes, and keep it for next year.
For Halloween specifically, this is the correct choice for most people. The designs that look best — chrome, 3D charms, fine detail work, long stiletto shapes — are the exact designs that are expensive at a salon and nearly impossible at home with a brush.
But there’s a catch, and it’s the reason people still think press-ons are bad: almost everyone applies them wrong. Done properly, a good set lasts two weeks. Done the way most people do it, they last two days.
This post covers both halves. What to buy, and how to make it actually work.
Why Press-Ons Beat a Salon Appointment for Halloween
Cost. A detailed Halloween gel set runs $60–120 plus tip. A comparable press-on set is $12–30.
Availability. Salon appointments in the last two weeks of October sell out by the first week of the month. Every year. Press-ons don’t have a booking calendar.
Damage. Gel removal takes layers off your natural nail, which is why November nails always look terrible. Press-ons, removed correctly, do far less damage.
Reusability. This is the part people miss. A well-made set can be removed, cleaned, and reapplied. Buy a good Halloween set once and you have it for the next three Octobers.
Reversibility. You can wear something absurd for one night and be back to normal nails the next morning. That’s not an option with gel.
The honest trade-off: press-ons will never be quite as durable as gel, and if you work with your hands all day, gel wins. For a party, a weekend, or a two-week October stretch, press-ons are the better call.
What to Look for Before You Buy
Material
ABS plastic is the standard. Hard, durable, holds shape well, cheap to produce. The downside is that it’s thicker and reads slightly less natural, and it doesn’t flex with your nail.
Soft gel is the upgrade. Thinner, flexible, looks much closer to a real gel manicure, and moves with your natural nail so it’s less likely to pop off under pressure. Costs more and is slightly less durable against hard knocks.
For Halloween designs with 3D elements, ABS is usually better because it can carry the weight. For anything you want to look natural, soft gel.
Number of nails in the set
Look for 24 nails minimum, ideally more. A 24-piece set gives you 12 sizes with duplicates, which means you can size each hand properly. Sets with only 10 or 12 nails are gambling that your fingers match their template. They won’t.
The best sets include half sizes. If a listing mentions half sizes, that’s a genuine quality signal.
Adhesive included
Most sets come with both nail glue and adhesive tabs. You want both, and they serve different purposes:
- Glue: one to two weeks of wear, much stronger bond, harder to remove
- Tabs: one to five days, gentler on the nail, completely reusable, and the nails come off easily
For a single Halloween party, tabs are enough and they’re kinder to your nails. For a two-week October run, use glue.
Check that the glue included isn’t a tiny 2g tube. Cheap sets skimp here and you’ll run out mid-application.
Shape and length, honestly assessed
Order the length you’ll actually tolerate, not the length in the photo. Extra-long stiletto looks incredible and makes it impossible to use your phone, open a can, or put in contacts. If you’ve never worn long nails, start medium.
Whether the design is printed or built
Look closely at product photos. A printed design is flat and will look flat in person. A built design has dimension — actual chrome, actual charms, actual raised elements. The price difference is usually $10 and it’s worth it.
What You Get at Each Price Tier
$8–15 — Budget ABS plastic, printed designs, 24 nails, basic glue. Perfectly fine for a single party. Expect them to look good in photos and slightly plasticky in person. Don’t expect to reuse them.
$15–30 — The sweet spot Better ABS or entry soft gel, hand-finished details, chrome and glitter that’s actually applied rather than printed, good glue, often a prep kit included. This is where most people should buy. Genuinely reusable.
$30–60 — Premium Soft gel, hand-painted or hand-assembled by a nail artist, custom sizing options, 3D elements, sometimes made to order. Looks indistinguishable from a salon set. Worth it if you’ll wear the set multiple times or if you’re in photos.
Above $60 Custom, made-to-measure from an independent artist. Beautiful, but you need to order six weeks out for Halloween, which means ordering in September.
20 Halloween Press-On Sets by Vibe
Press-ons are best at the designs that are hardest to do by hand. That’s what this list prioritizes.
Cute & Cartoon
1. Ghost French Tips
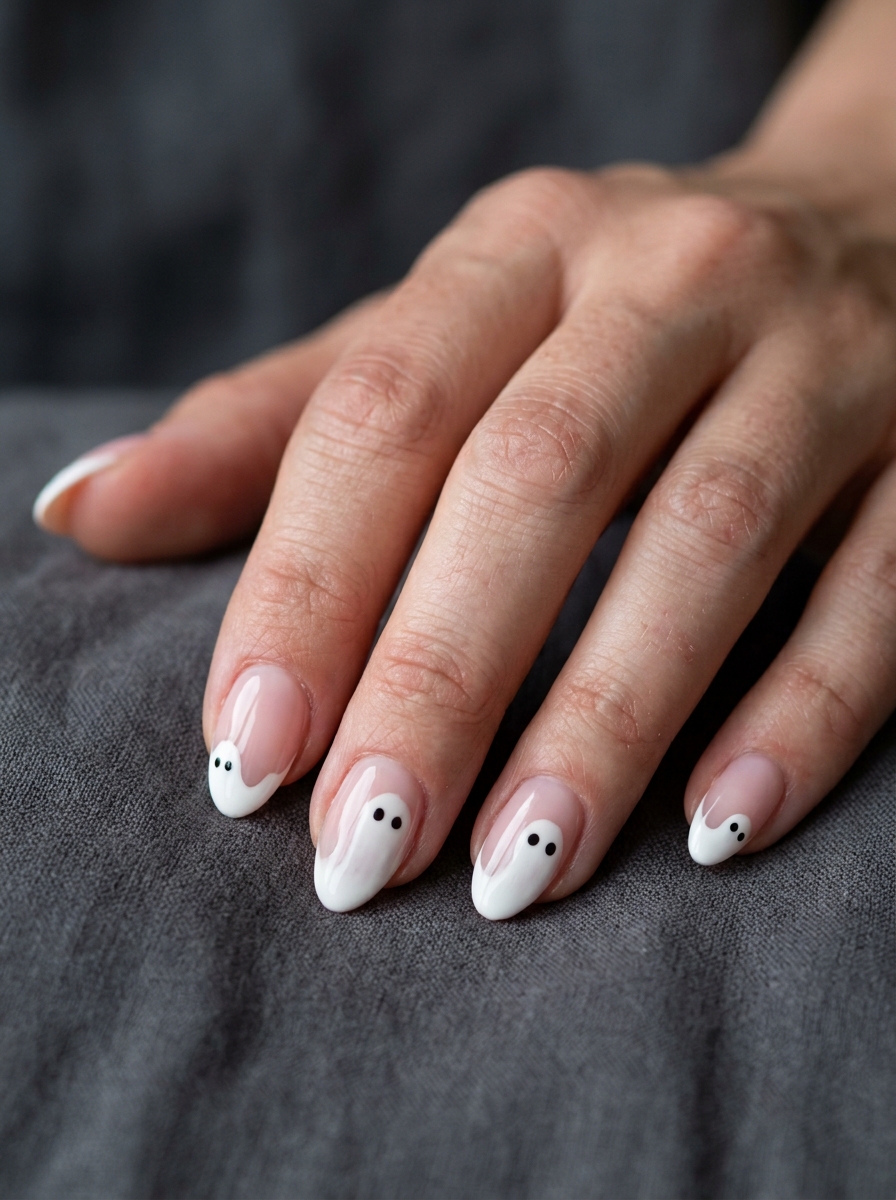
A french tip with a wavy ghost bottom edge. The most wearable Halloween set there is, and office-appropriate.
2. Black Cat Faces
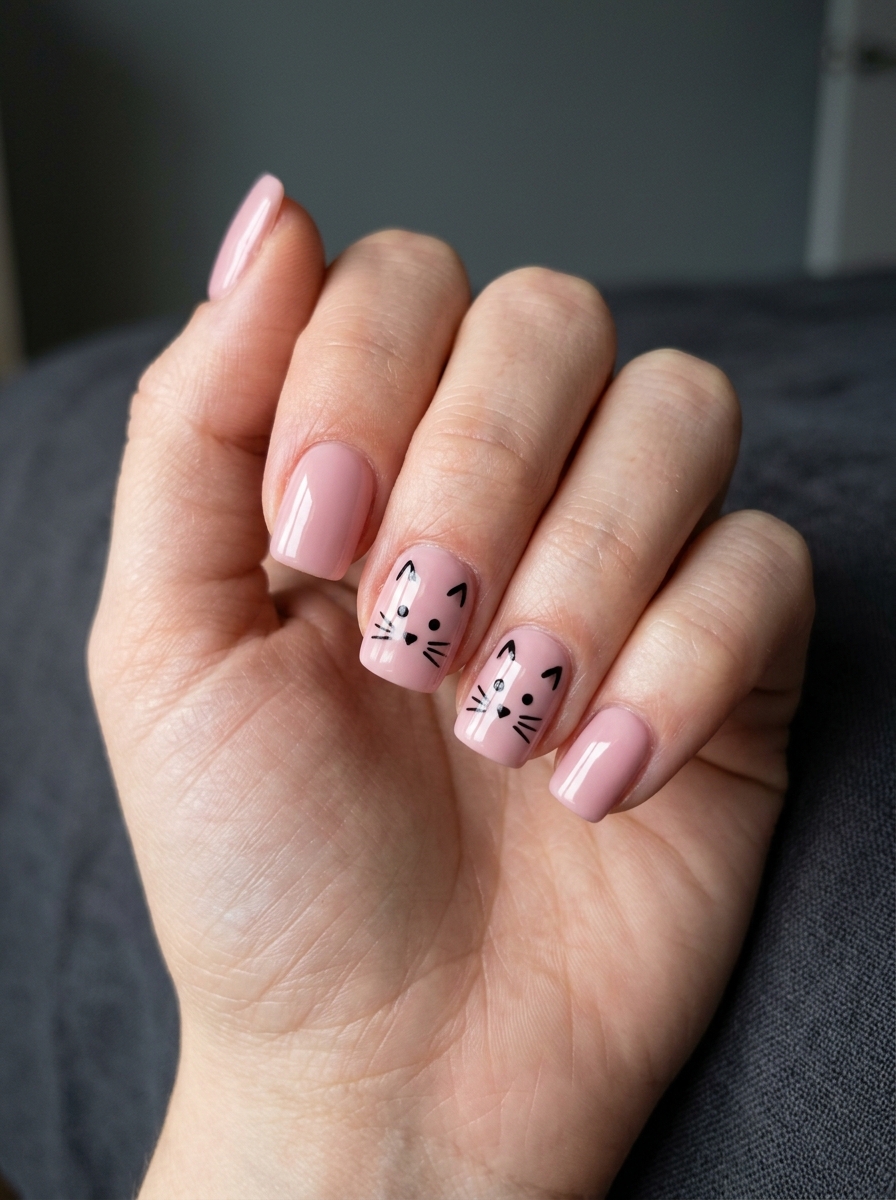
Simple cat features on two accent nails over soft pink. Short square works best.
3. Bat Scatter on Lilac
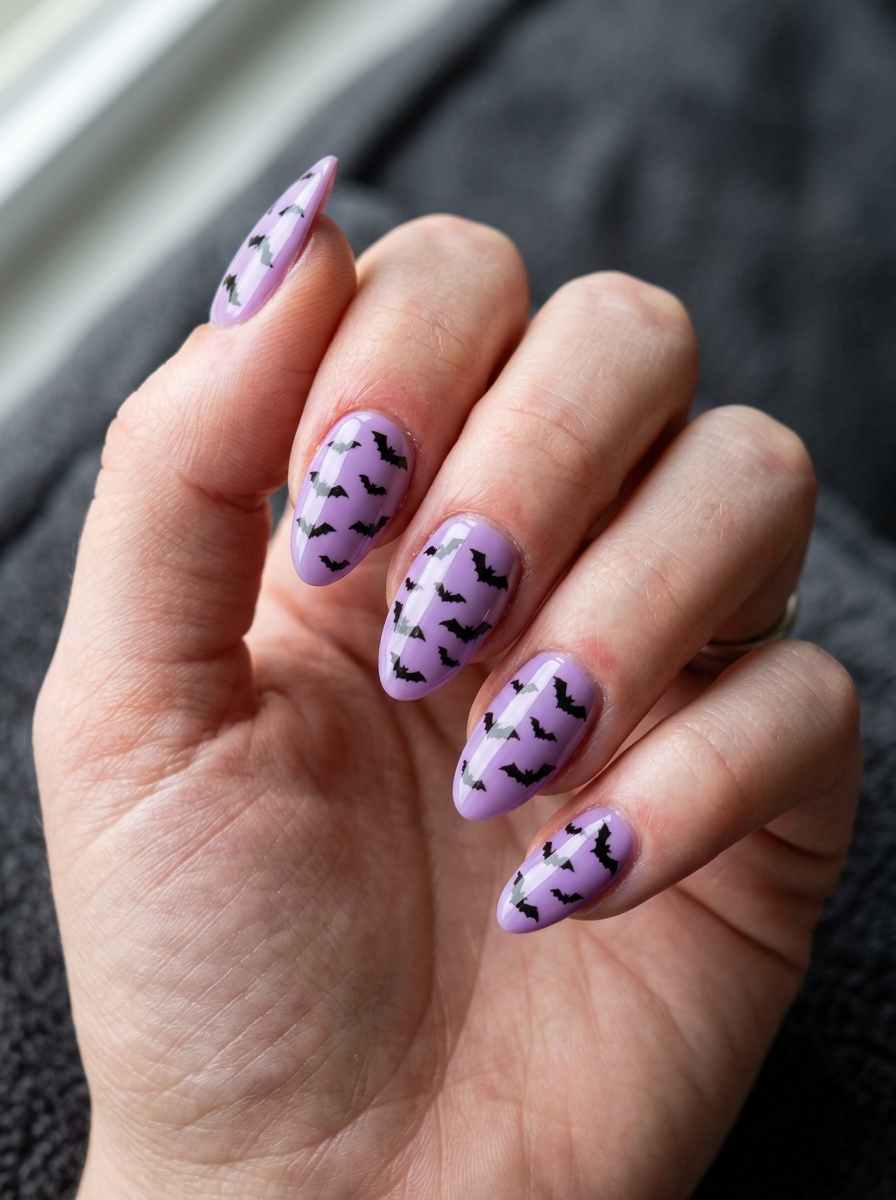
Small bats at varied angles across a lilac base. Cute rather than creepy.
4. Candy Wrapper Mix
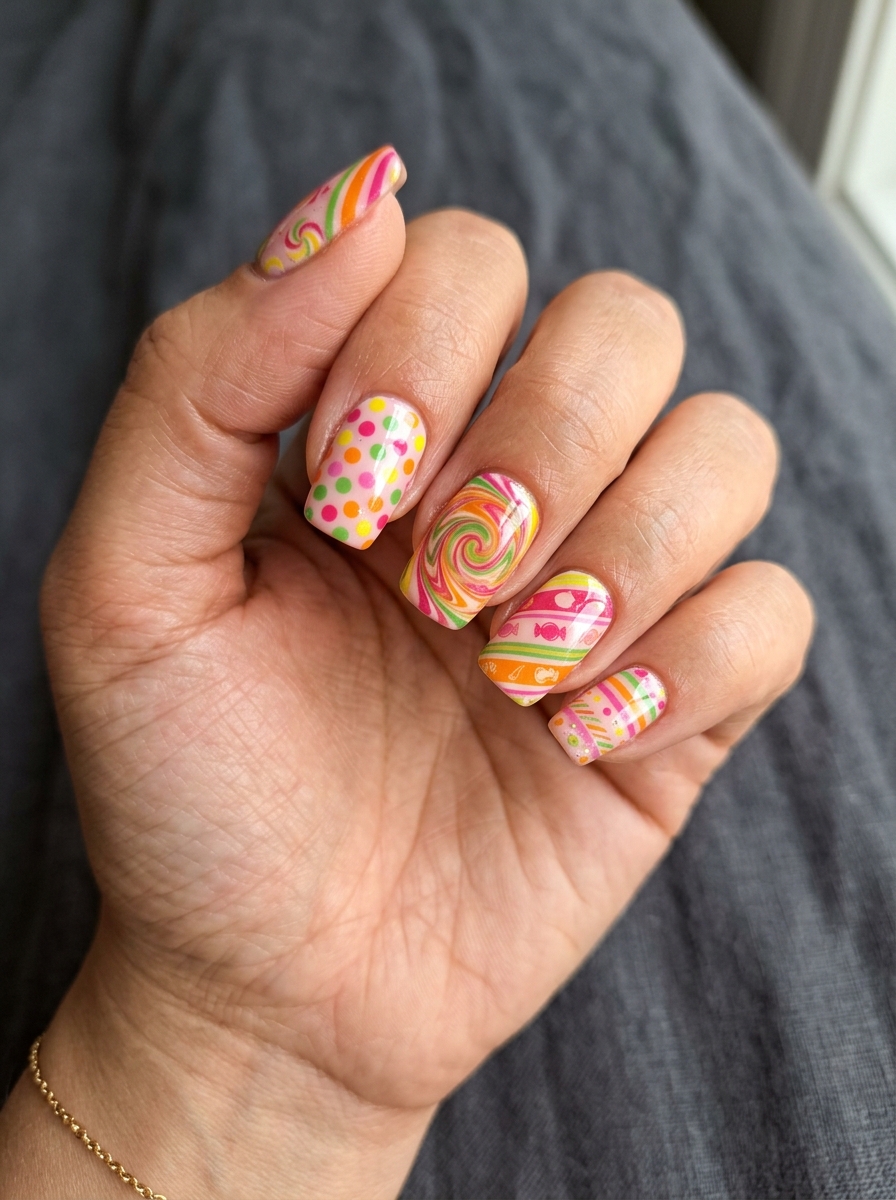
Every nail a different bright candy pattern. Loud and joyful.
Witchy & Celestial
5. Moon Phase Set
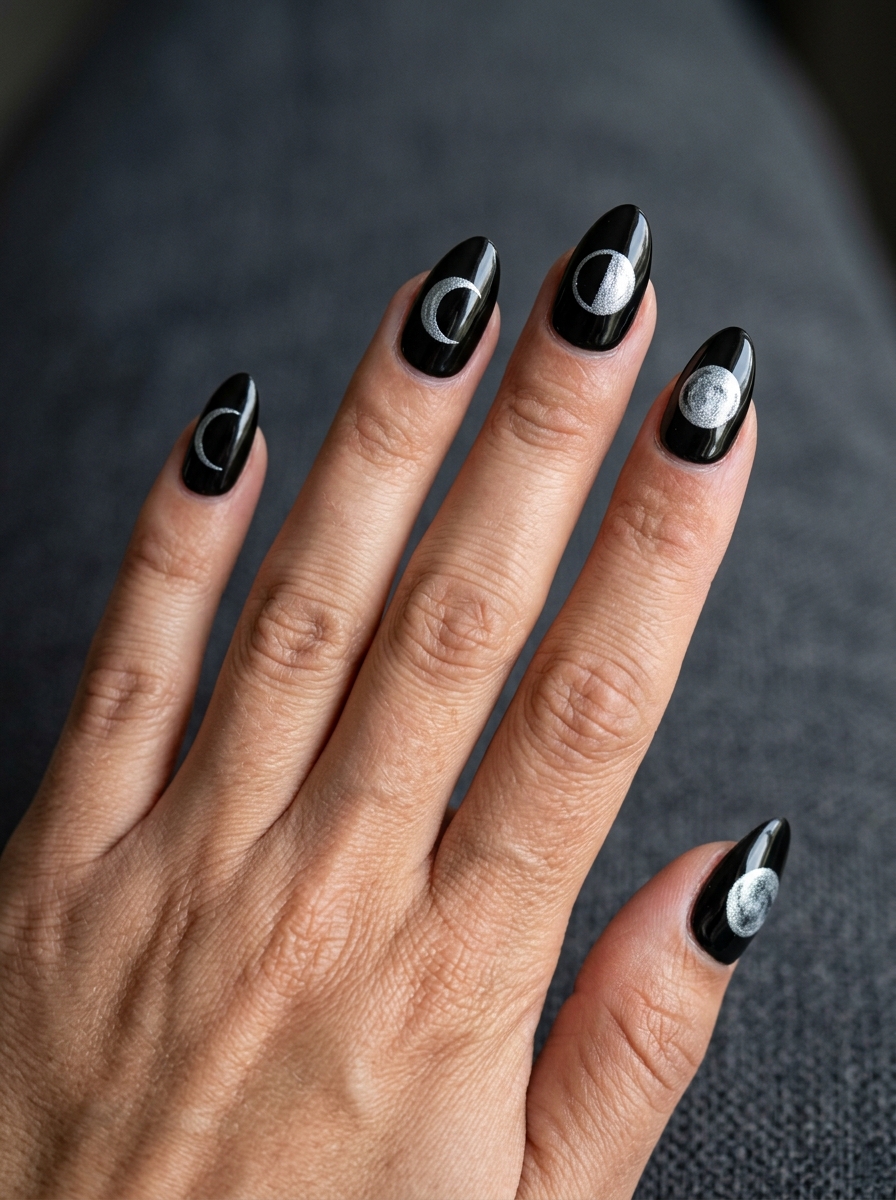
Each nail a different phase in silver on black. Reads as deliberate because it is.
6. Black Chrome
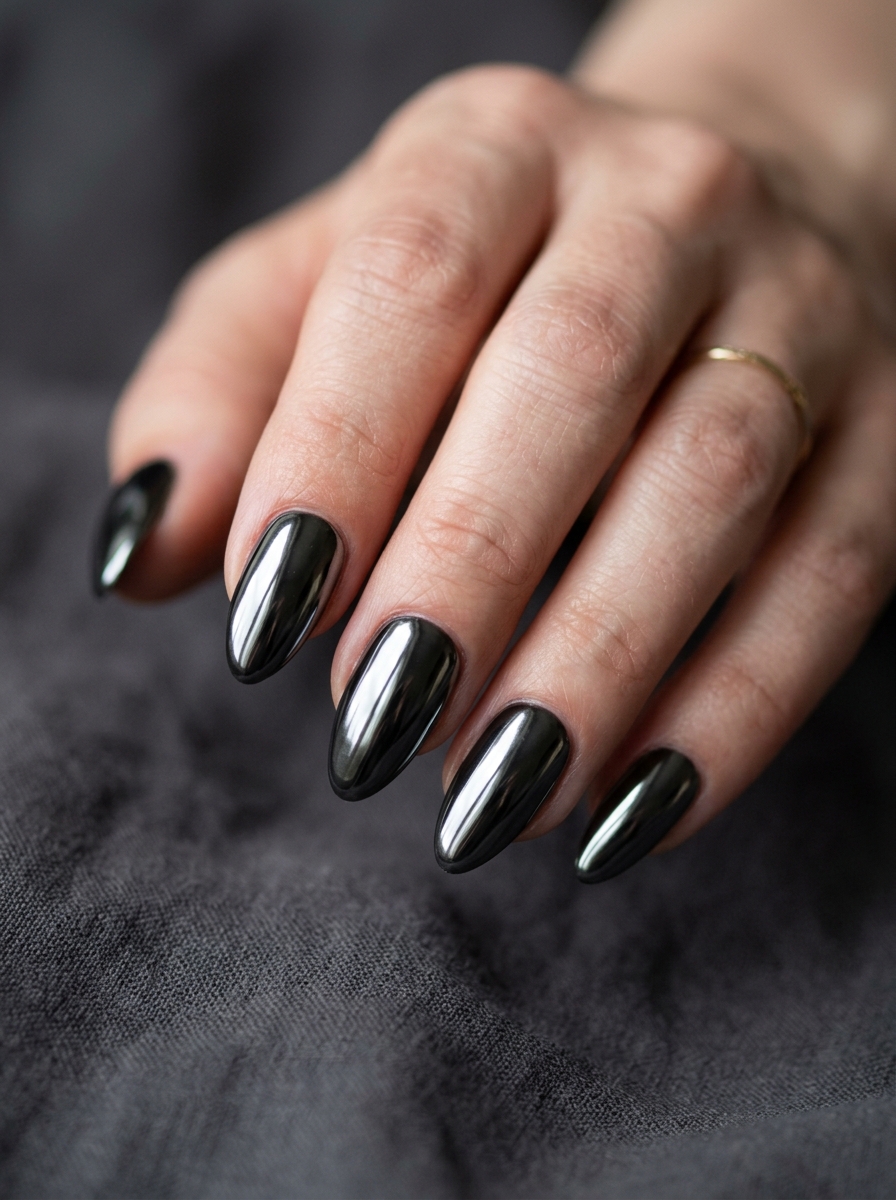
Mirror-finish black. Impossible to achieve at home without a gel setup, which is exactly why you buy this rather than make it.
7. Gold Tarot Linework
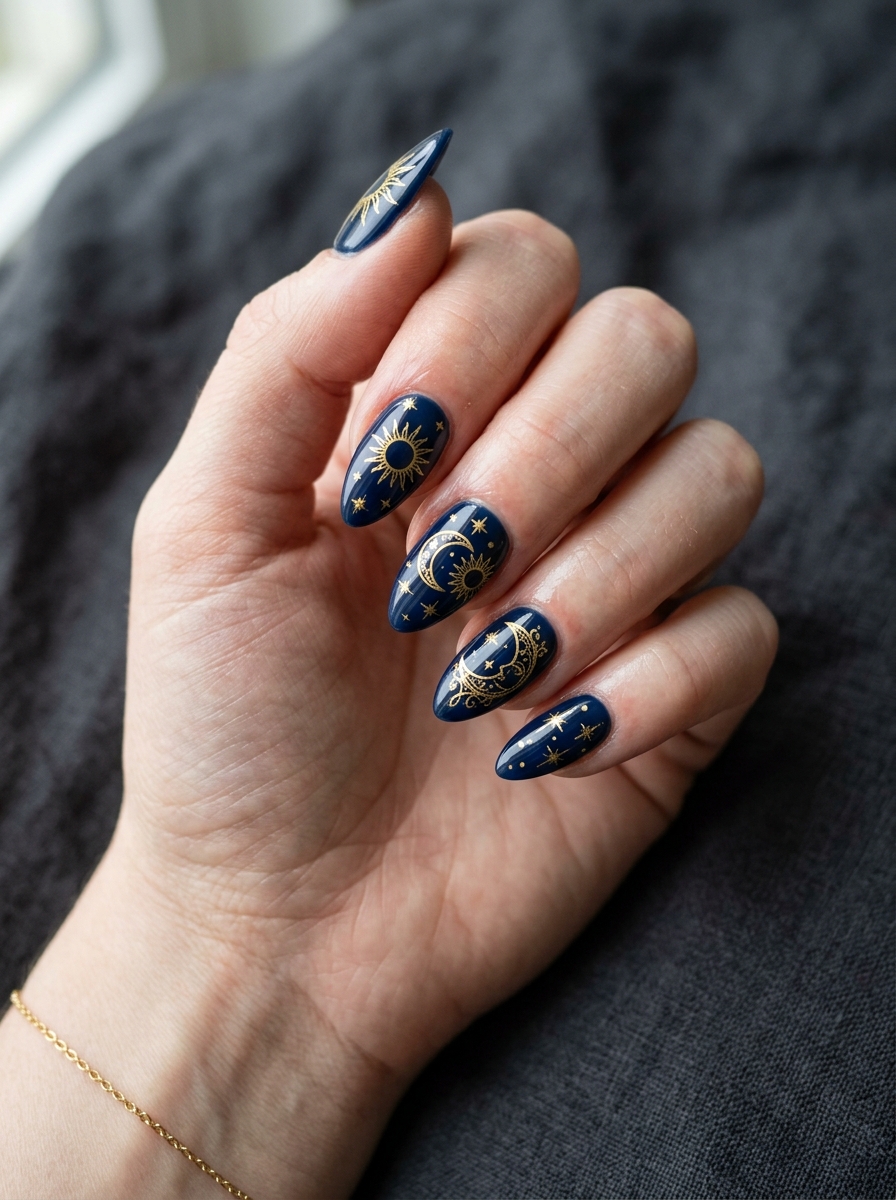
Sun, moon, and star imagery in gold on deep navy. Detailed work you’d pay $90 for at a salon.
8. Purple Aura
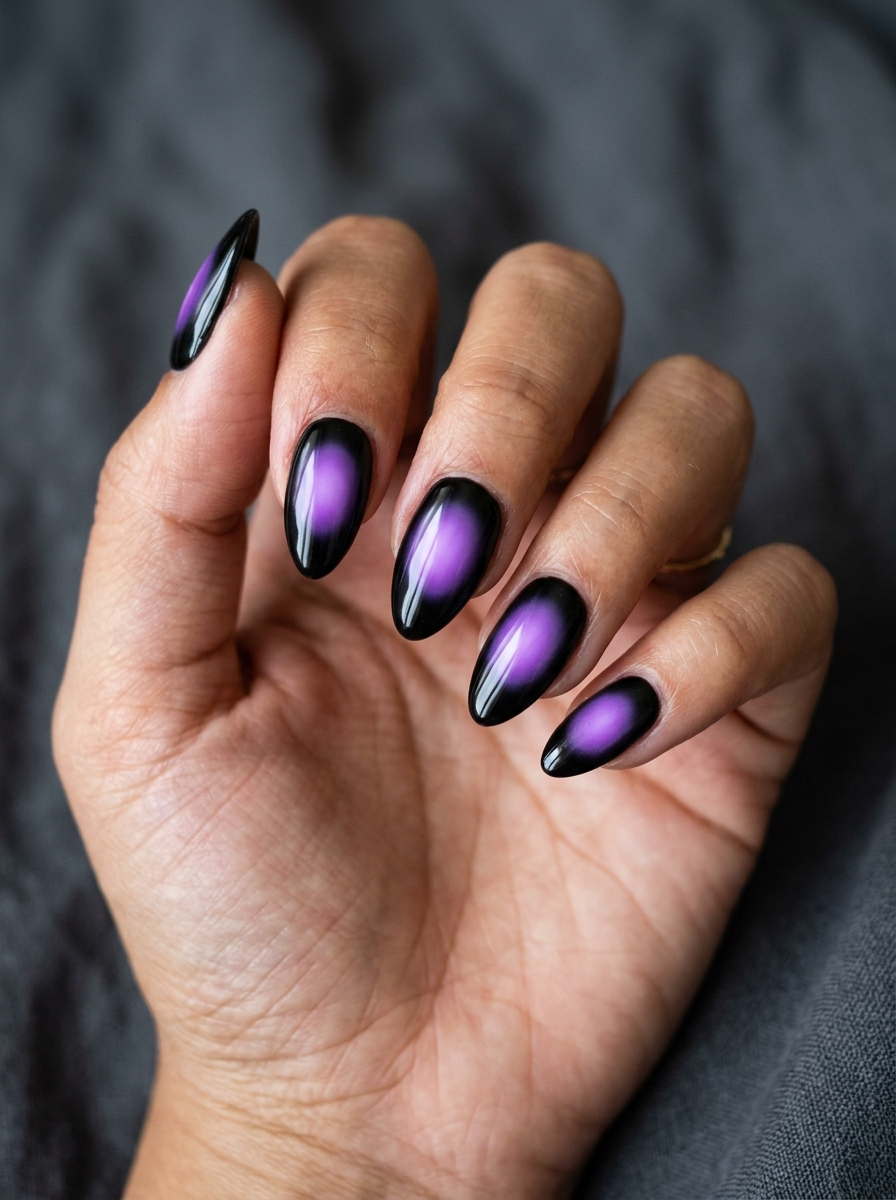
The glowing halo effect in purple against black. The most-saved nail style of the last two seasons.
Horror & Gore
9. Blood Drip Tips
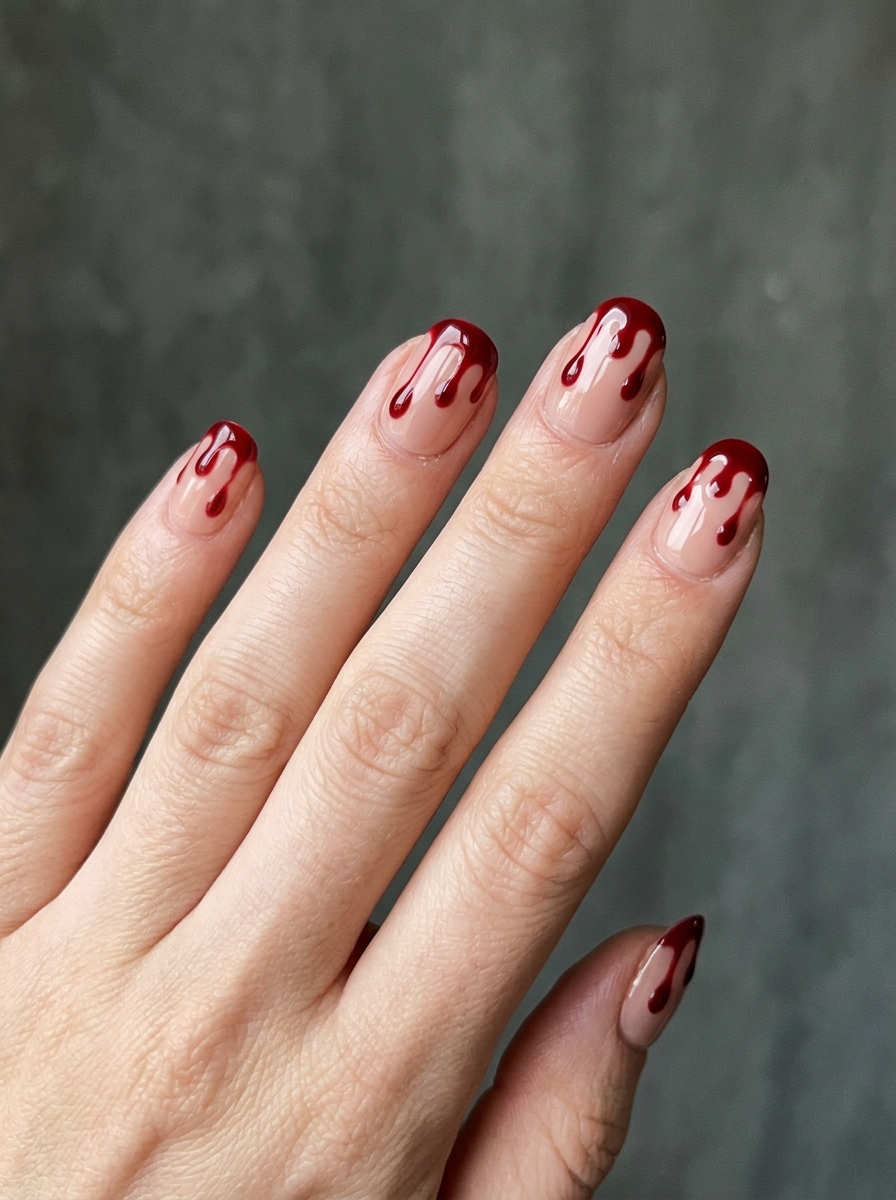
The classic. Look for a set where the drips vary in length; uniform drips look like a pattern, not blood.
10. Cracked Porcelain Doll
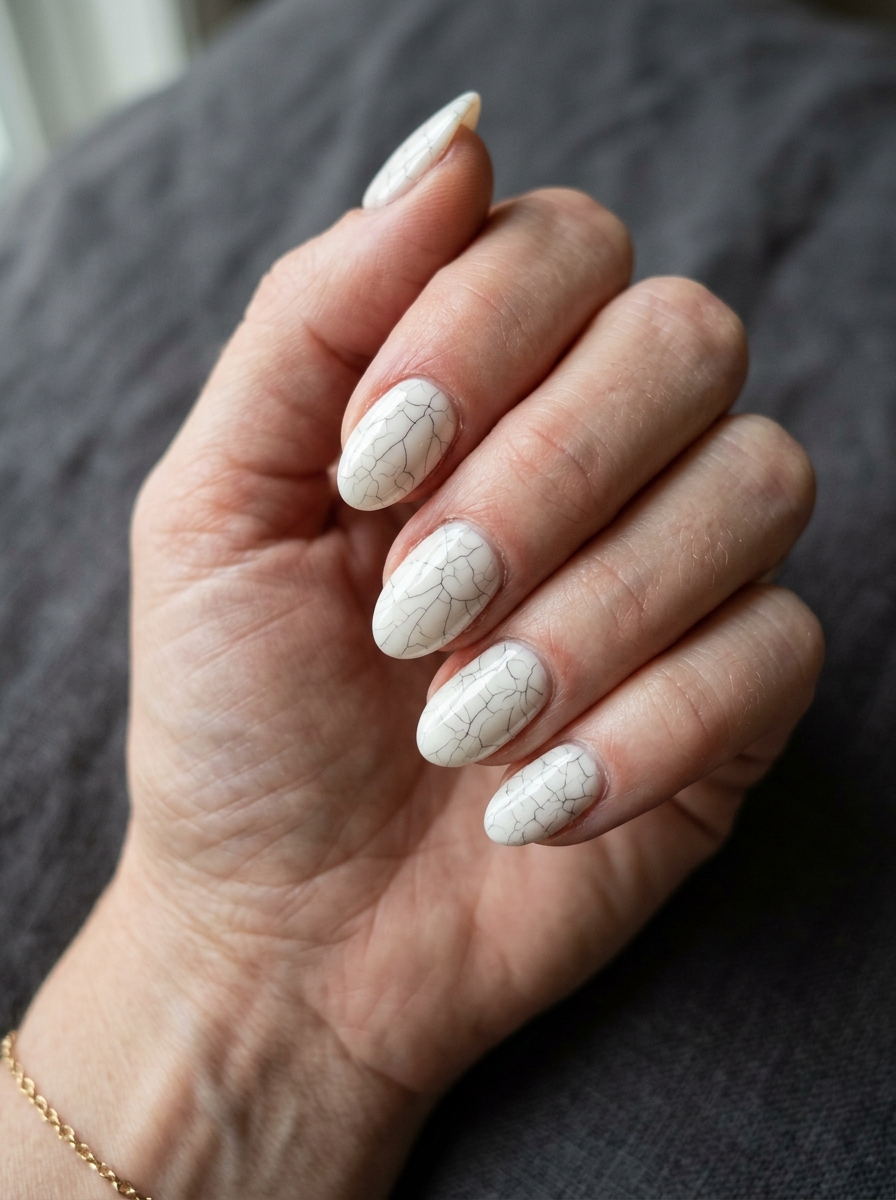
Milky white with fine dark cracks. Subtle, genuinely unsettling, and the most sophisticated horror set available.
11. Stitched Green
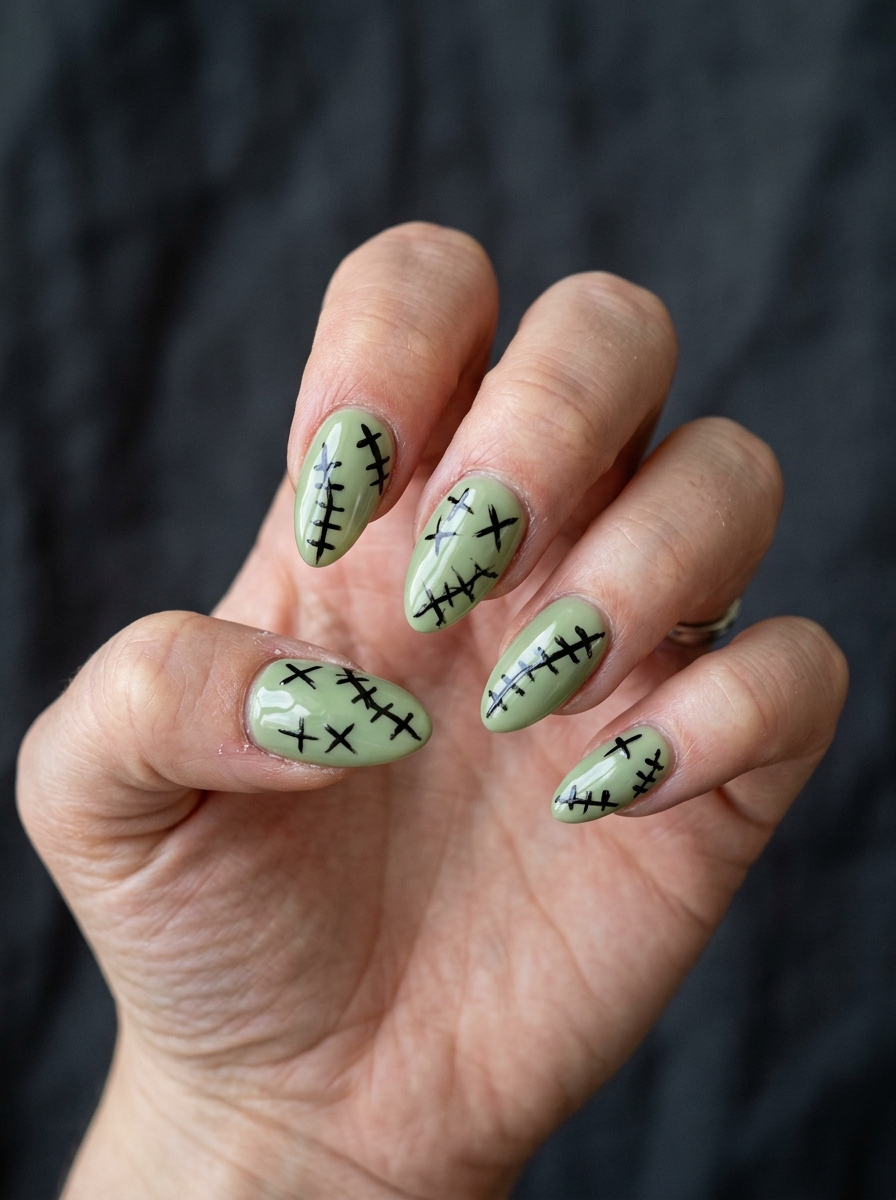
Sickly green with crude black stitching. The unevenness is the point.
12. 3D Spider Charm
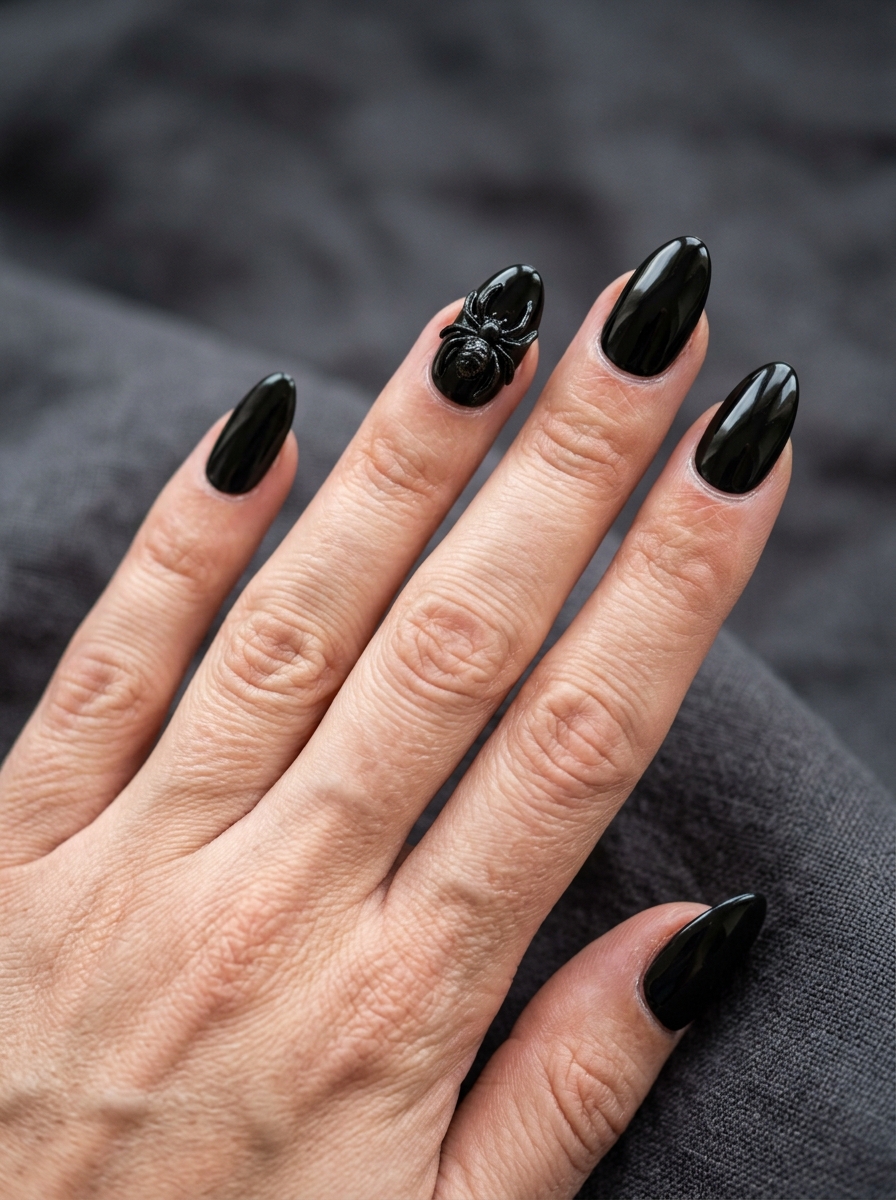
Raised spider on a black base. This is the single best argument for press-ons, because doing this by hand is not realistic.
Minimalist & Work-Safe
13. Micro Black French
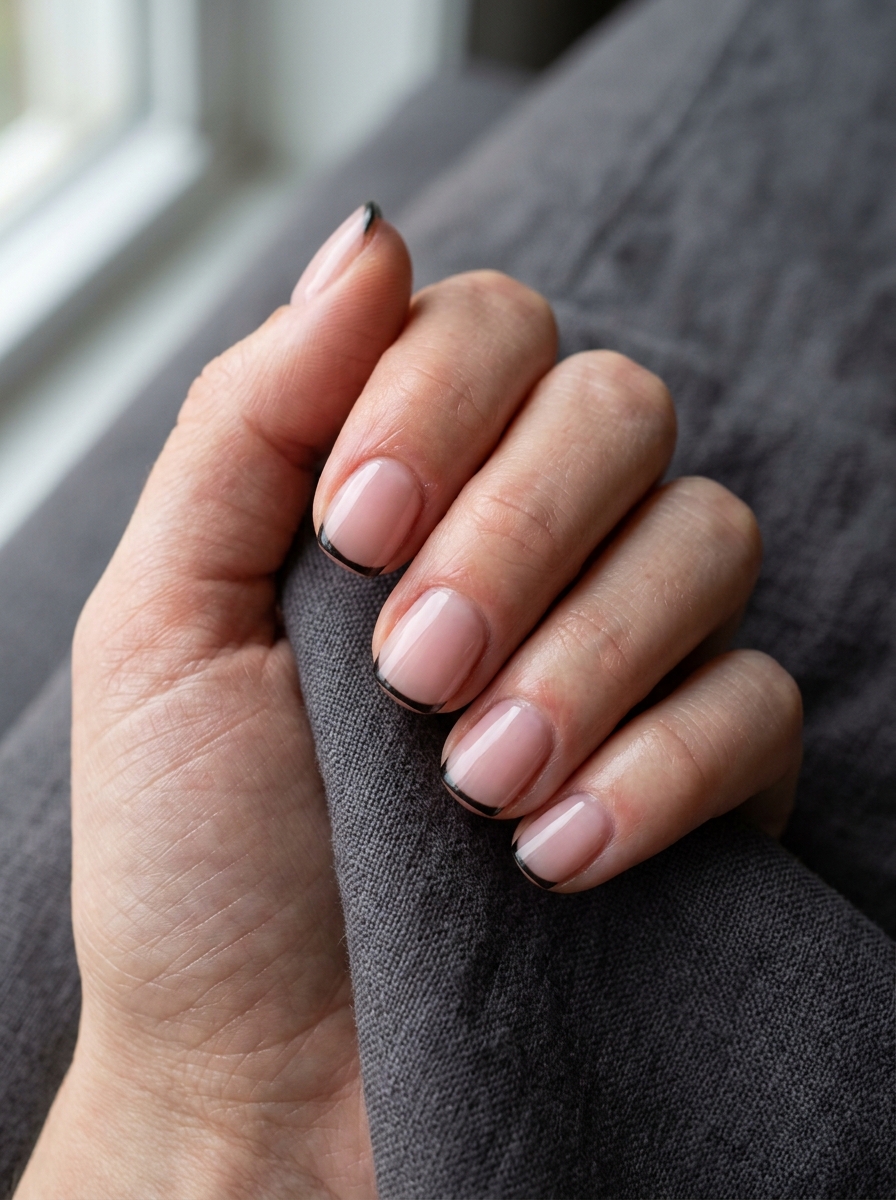
Hairline black tip on sheer pink. Chic first, Halloween second.
14. Single Bat Silhouette
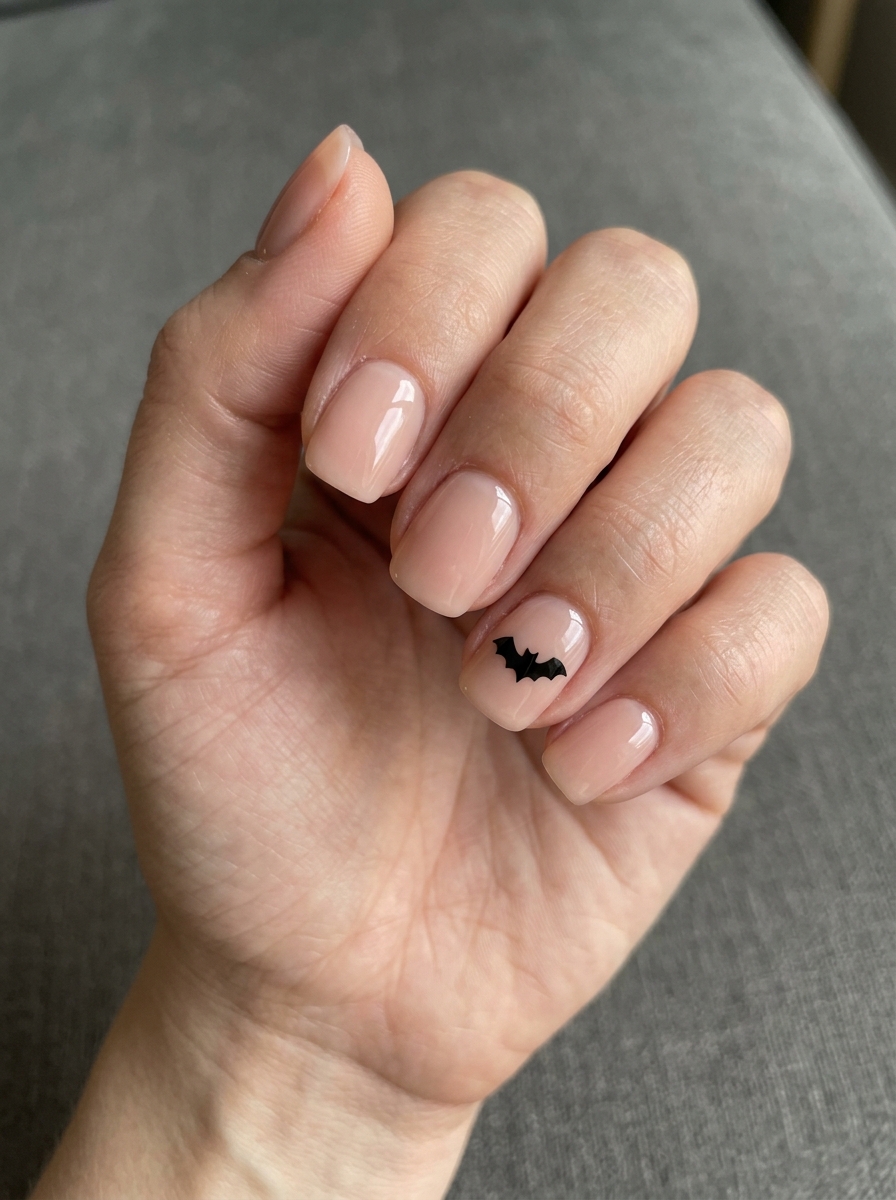
One small bat, one nail, everything else bare. The restraint is the whole design.
15. Solid Oxblood
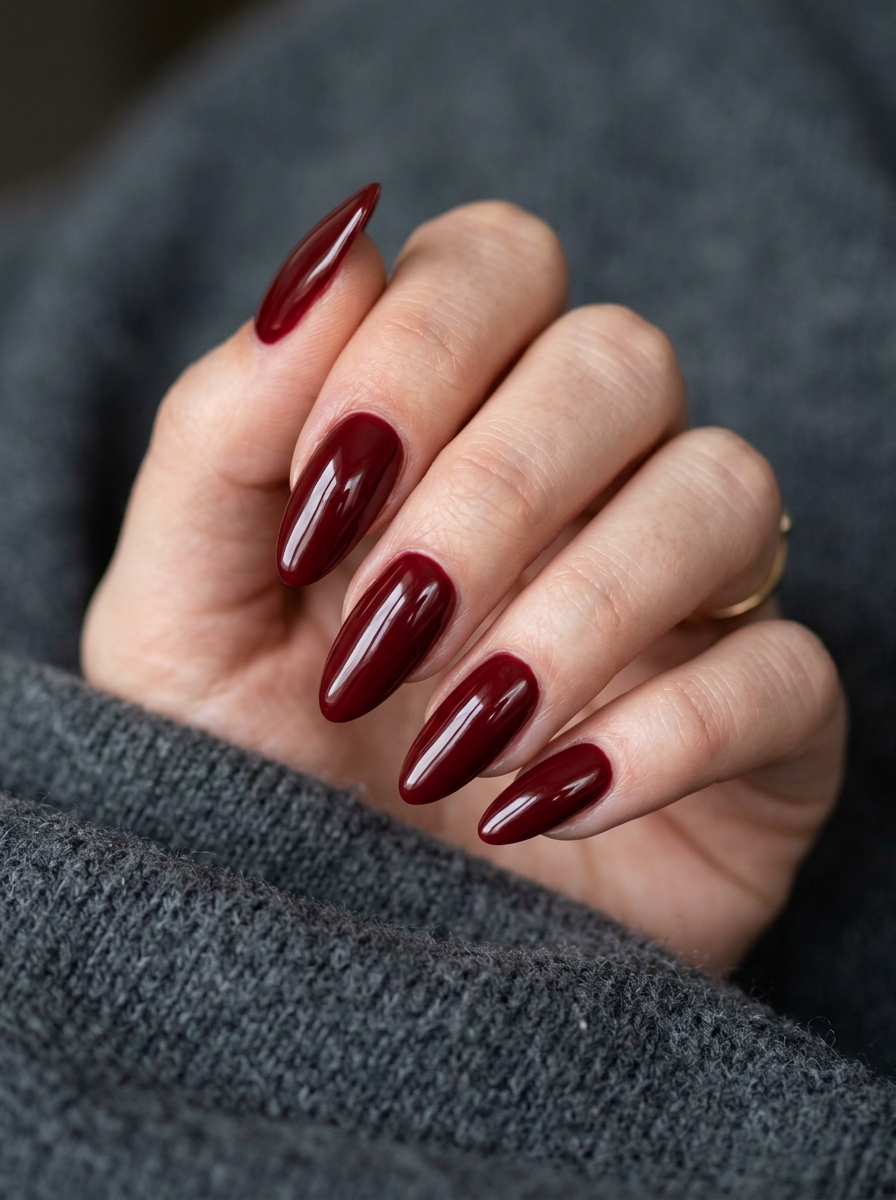
No art at all. Most flattering Halloween color, and it carries through to December.
16. Hairline Web on Milky White
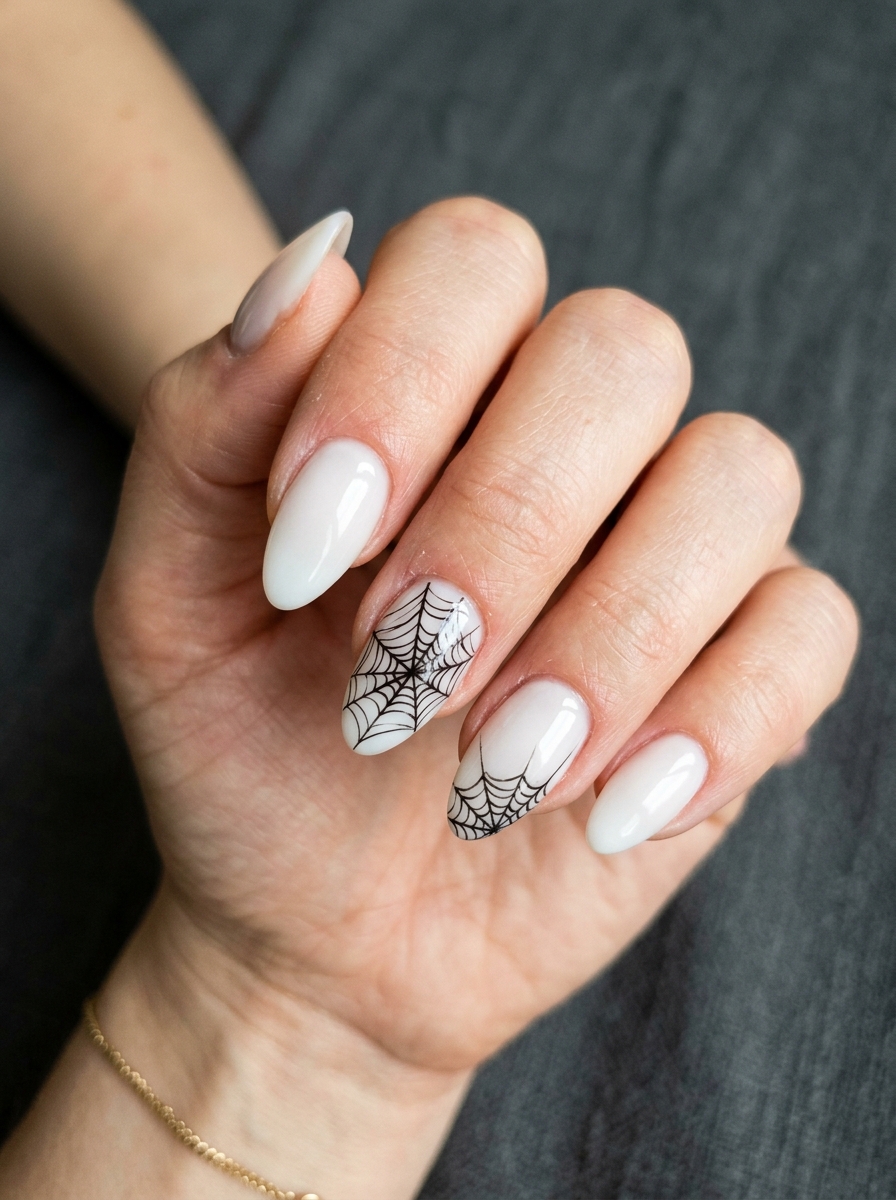
A spiderweb so fine it looks drawn in pencil. The most elegant option on this list.
Statement & Long
17. Long Stiletto Blood Tips
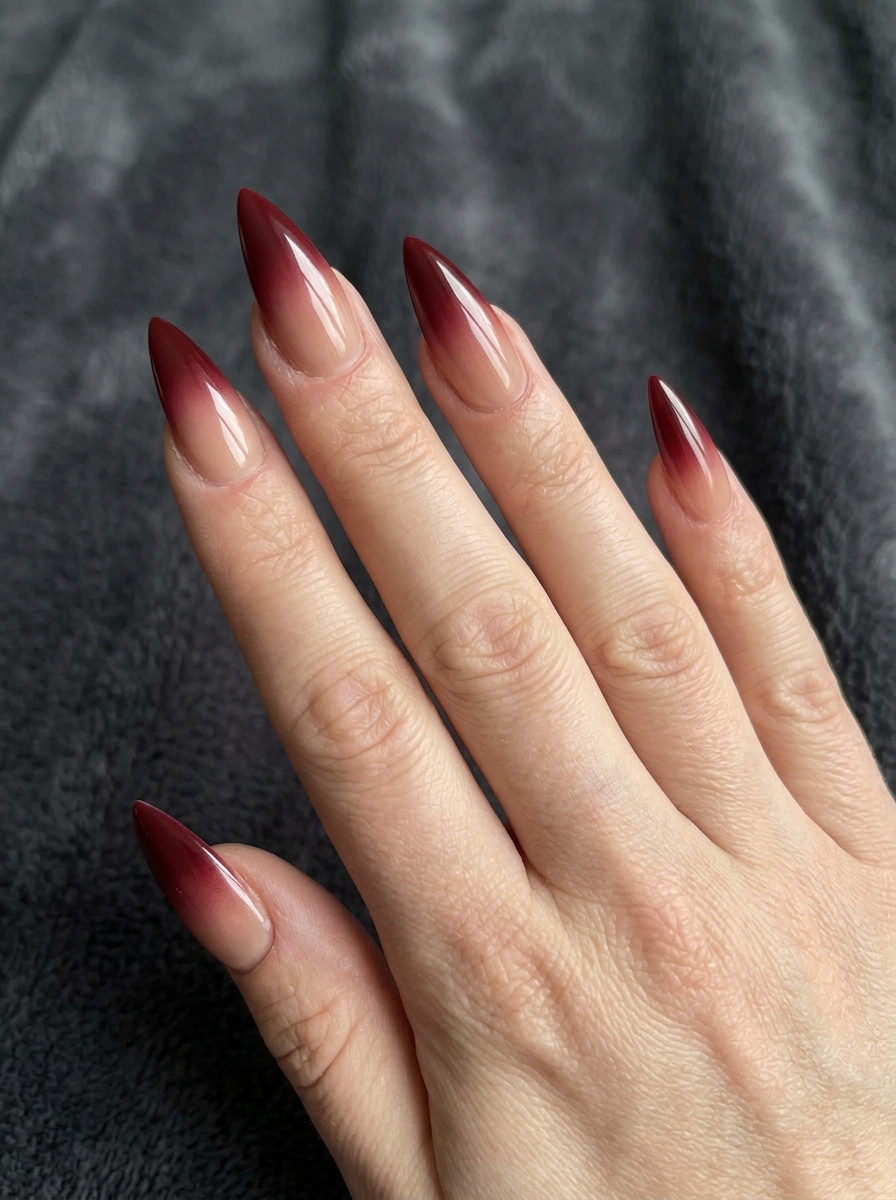
Deep red fading up from a sharp point. The shape does half the work.
18. Mixed Halloween Mani
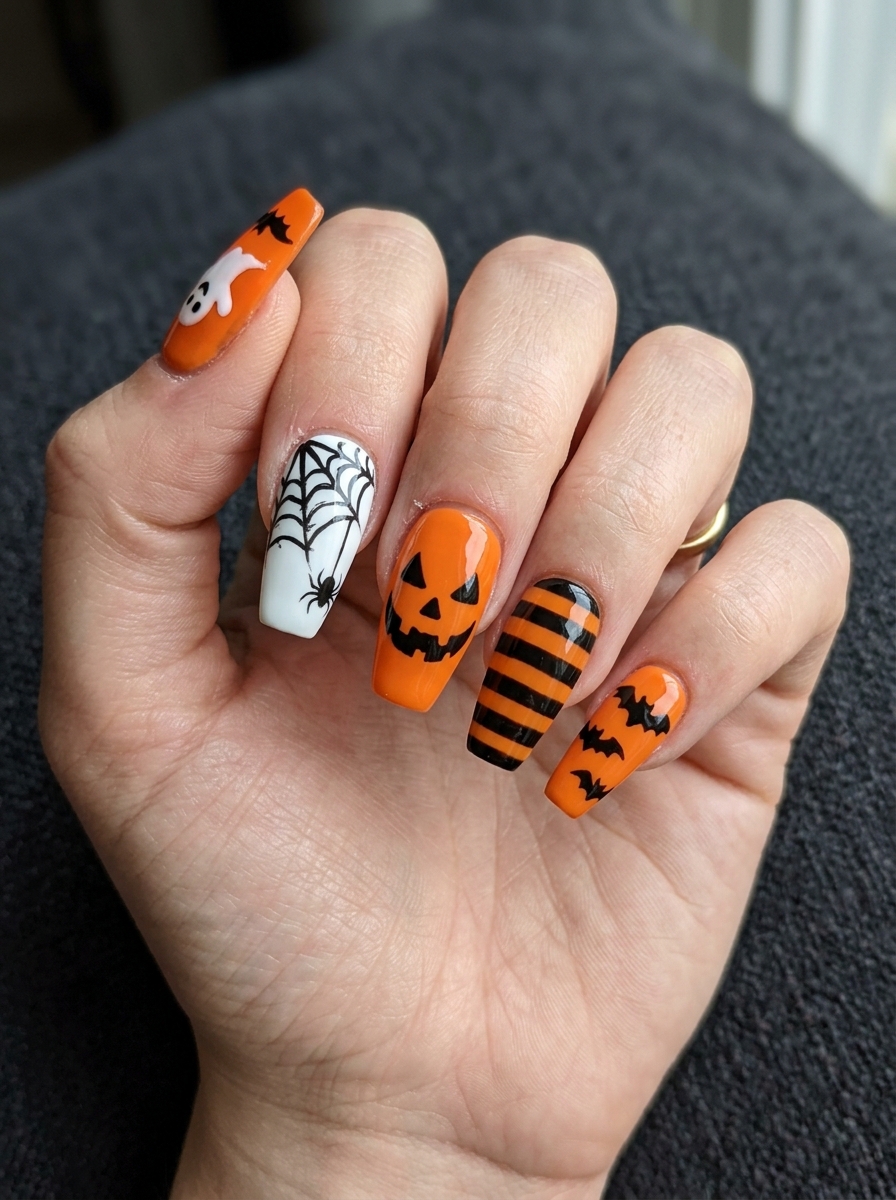
Ten different designs unified by three colors. Buying this as a set solves the palette discipline problem for you.
19. Black Lace Overlay
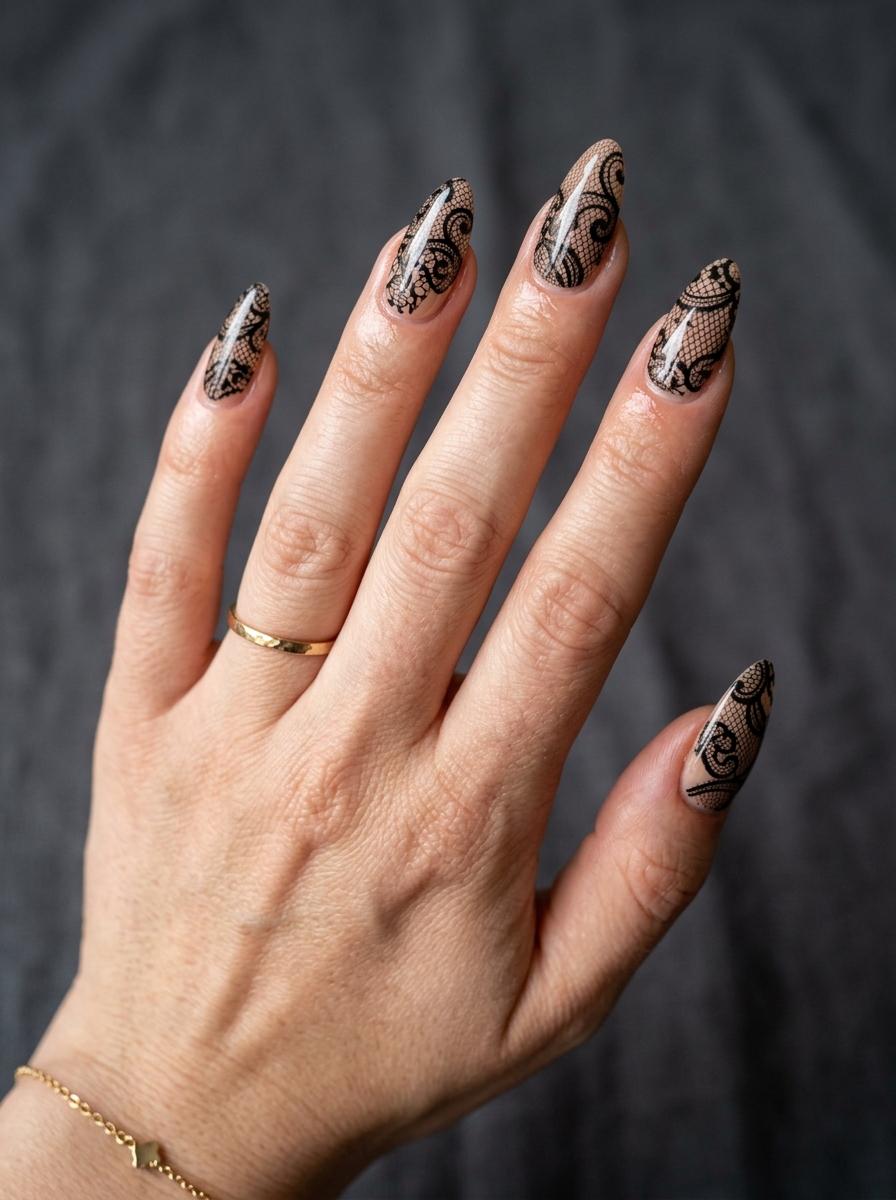
Fine lace over nude, full length. Gothic and bridal at the same time.
20. Magnetic Cat-Eye Green
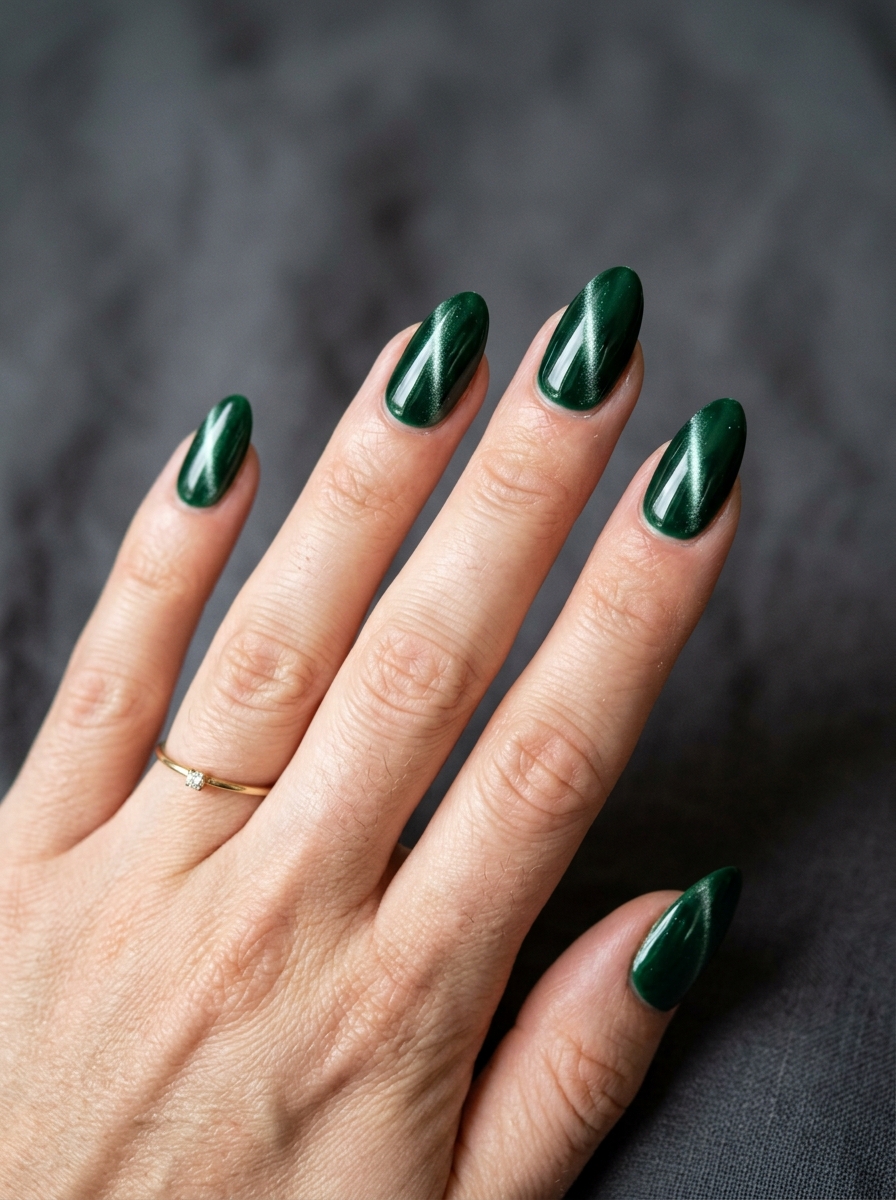
Deep green with a diagonal light streak. The finish shifts as your hand moves.
How to Get Sizing Right
Wrong sizing is the number one reason press-ons fail, and it causes both problems people complain about: they pop off, or they hurt.
Size before you glue. Always. Lay out the set and match each nail to each finger dry, with no adhesive. Take five minutes on this. It’s the difference between two days and two weeks.
The nail should cover your natural nail edge to edge. If you can see natural nail on either side, it’s too small, and it will lift within hours. Every bit of exposed edge is somewhere water can get in.
If it overhangs the sides, it’s too big and will catch on everything until it tears off.
When between sizes, go up. A slightly large nail can be filed down at the sides. A small one cannot be fixed.
Your two hands are different sizes. Usually your dominant hand is slightly wider. Size each hand separately.
Thumbs are almost always the problem. Most sets run small on thumbs. If a set has a sizing kit, use it specifically to check your thumbs.
Once you’ve sized a set, note the sizes somewhere. Future orders get much faster.
Application: How to Make Them Last Two Weeks
This is the section that matters. Twenty minutes done properly beats five minutes done badly by about twelve days.
1. Push back your cuticles. Use a wooden stick or a metal pusher, gently. Any cuticle sitting on the nail plate becomes a lifting point.
2. Buff the shine off — lightly. You’re removing the glossy surface so glue has something to grip, not thinning your nail. A few passes with a fine buffer is enough. This step is the biggest single factor in how long the set lasts.
3. Wipe with alcohol. Use the prep pad in the kit, or rubbing alcohol on a cotton pad. This removes oil, and oil is the enemy of adhesion. Do not skip this and do not touch your nails after.
4. Size everything dry. Lay out all ten before you open the glue.
5. Glue both surfaces. A thin layer on your natural nail and a thin layer inside the press-on. Most people only glue one and wonder why it fails. Thin is key — too much glue squeezes out the sides and creates lift points.
6. Apply at an angle, then roll. Place the press-on at your cuticle line at roughly a 45-degree angle, then roll it down flat toward the tip. This pushes air out. Pressing straight down traps air bubbles, and air bubbles are where the whole thing starts coming apart.
7. Press and hold for 30 seconds. Actually count. Firm, even pressure.
8. Do not get them wet for two hours. No dishes, no shower, no hand washing beyond the absolute minimum. The glue is still curing.
9. File the sides if anything overhangs. After application, not before.
Optional but effective: run a thin bead of glue around the seam where the press-on meets your cuticle. It seals the edge and adds days.
Troubleshooting: Why Yours Keep Falling Off
They popped off within a day → almost always the prep. You either didn’t buff, didn’t use alcohol, or applied lotion beforehand. Oil kills adhesion.
They lift at the sides after a few days → sizing. The nail was too small and left exposed edges.
They lift at the cuticle → cuticles weren’t pushed back, or glue got underneath. Seal the seam next time.
One specific nail keeps failing → usually a thumb or index, and usually a size problem on that finger alone. Size that finger up.
There are air bubbles under them → you pressed straight down instead of rolling from cuticle to tip.
They hurt or feel tight → the nail is too narrow and is squeezing your nail bed. Take it off. Do not leave it on hoping it settles.
They caught on something and tore → too long for your life. Go shorter next time, and file the free edge slightly rounded even on a square shape.
Water gets underneath and they smell → this is the one to take seriously. Moisture trapped between a lifted press-on and your natural nail is how fungal problems start. If a nail lifts, remove it properly rather than gluing over the top.
How to Remove Them Without Wrecking Your Nails
Never pry them off. This takes layers of your natural nail with it and is the reason people think press-ons cause damage. Press-ons don’t damage nails. Impatient removal does.
The gentle method: soak your hands in warm water with a few drops of dish soap or oil for 10–15 minutes. The adhesive softens. Then work a wooden cuticle stick gently under the edge and lift slowly. If it resists, soak longer.
The fast method: soak cotton in acetone, place on the nail, wrap in foil, wait 10 minutes. Faster but drying, and it will dissolve the design on cheaper sets so you can’t reuse them.
After removal: buff off any glue residue very lightly, then cuticle oil. Your nails will be a bit dry. Give them a day off before the next set if you can.
How to Reuse the Set
The economics change completely once you know this. A $28 set used three Halloweens is under ten dollars a year.
- Remove using the warm water method, not acetone.
- Peel the old glue off the underside of each press-on. It usually comes away in one piece once dry. A quick swipe with an acetone-soaked cotton bud handles anything stubborn.
- Check for cracks. Toss anything damaged.
- Put them back in the original tray in size order and keep the tray. This is the step everyone skips and it’s why they lose the set.
Sets applied with adhesive tabs rather than glue reuse almost perfectly. Glued sets reuse well two or three times before the fit degrades.
Halloween-Specific Warnings
Apply your nails last. After makeup, after hair, after getting into the costume. Long nails make eyeliner and zippers genuinely difficult, and you’ll be tempted to rush the glue if you do it first.
3D charms catch on fabric. If your costume involves lace, mesh, fishnets, or a wig, skip the raised elements. You will spend the entire night snagging.
Order by mid-October. Shipping gets unreliable in the last two weeks and the popular sets sell out. If you want something custom from an independent maker, order in September.
Buy two sets if you have events across multiple weekends. Cheaper than a salon rebook, and you get two looks.
Test the set a week early. Apply one nail, wear it for a day, see how it holds. Finding out your sizing is wrong on the 31st is a bad way to find out.
Keep the glue with you. Put the tube in your bag. One nail always goes rogue at 11pm, and a ten-second fix beats going home lopsided.
FAQ
How long do press-on nails last?
One to two weeks with glue and proper prep. One to five days with adhesive tabs. Poor prep drops that to a day or two regardless of which adhesive you use.
Do press-on nails damage your natural nails?
Not when applied and removed correctly. Damage comes from over-buffing during prep and from prying them off instead of soaking. Both are avoidable.
Are press-ons or gel better for Halloween?
Press-ons, for most people. The intricate designs Halloween calls for are expensive in gel and easy in press-on form, and you can remove them the next day rather than living with them for three weeks.
Can you shower and wash dishes with press-ons?
Yes, after the first two hours. Prolonged hot water soaking will shorten their life, so wear gloves for dishes if you want the full two weeks.
What size press-on nails should I buy?
Match each nail to your natural nail so it covers edge to edge. Size up when you’re between sizes, size each hand separately, and pay particular attention to thumbs, which run small in most sets.
Can you reuse press-on nails?
Yes, if you remove them by soaking rather than prying, peel off the old glue, and store them in the original tray. Two to three reuses is typical with glue, more with adhesive tabs.
How much should I spend on Halloween press-ons?
$15–30 is the sweet spot. Below that you’re getting flat printed designs. Above that you’re paying for hand-finished work, which is worth it if you’ll reuse the set.