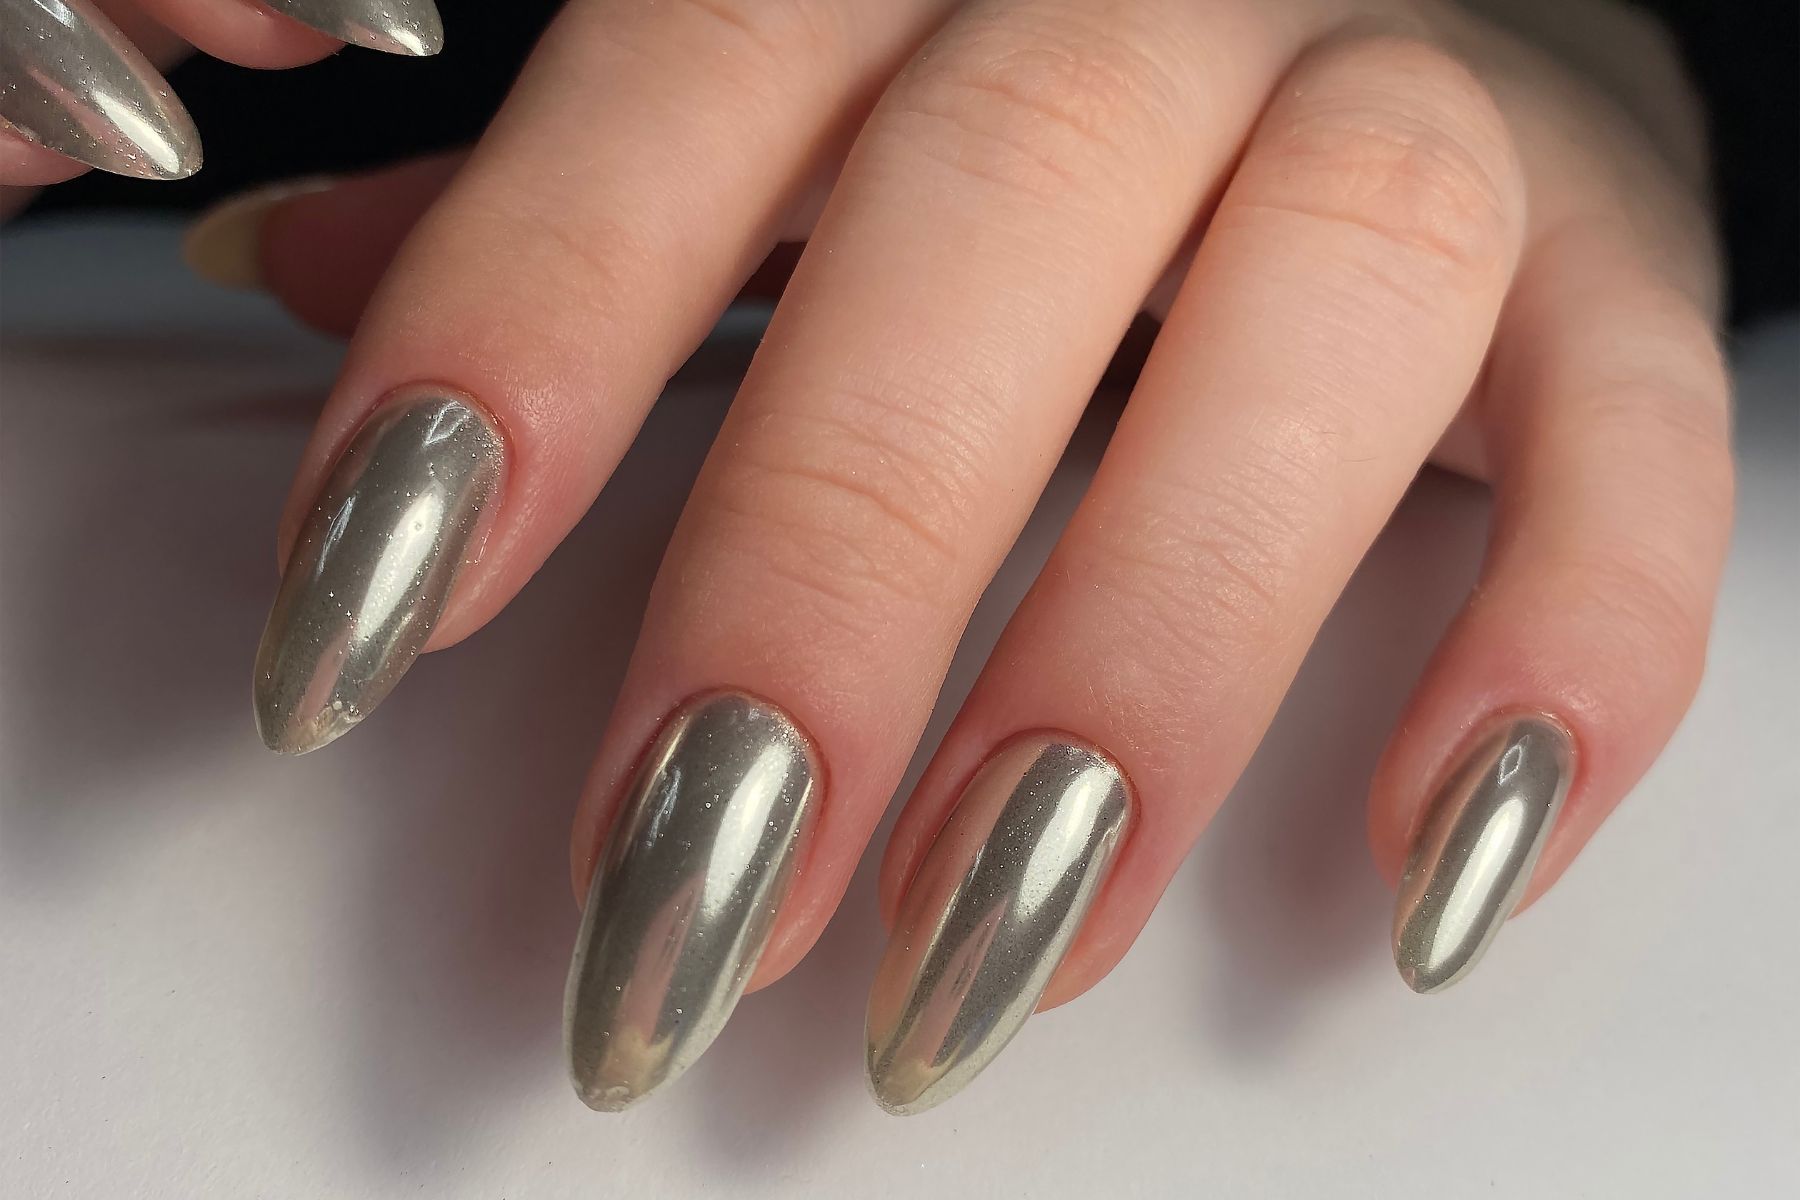
If 2024 was the year of clean girl nails, 2026 is the year of bedazzled everything. Pinterest editors officially flagged “Bedazzled Everything” as one of the biggest rising aesthetics — and bedazzled nails are leading the charge. Rhinestones, pearls, chrome charms, gemstone clusters, and full crystal coverage are everywhere on your feed, and there’s no sign of slowing down.
This isn’t subtle. This isn’t quiet luxury. This is more is more, on purpose, with full commitment.
This post is the complete guide to 21 bedazzled nail ideas for 2026 — sorted from “soft sparkle” (where one accent nail gets the gems) to “fully encrusted” (where every millimeter is covered). You’ll also get the rules that separate “expensive bedazzled” from “tacky bedazzled” (the line is thin), the gem types that work best, and how to DIY without losing rhinestones every two hours.
What Are Bedazzled Nails?
Bedazzled nails are exactly what they sound like — manicures with rhinestones, pearls, crystals, charms, or gems applied as the main design element, not just an accent.
The 2026 version isn’t your 2012 Bedazzler-kit version. The new bedazzled aesthetic is:
Dimensional. Multiple textures stacked — flat-back rhinestones next to 3D pearls next to chrome charms. The dimension is what makes it look expensive instead of craft-store.
Cohesive. Even when fully encrusted, there’s a clear color story. Cool tones together. Warm tones together. Pearl + silver together. Never a chaotic gem grab-bag.
Strategic. Bedazzling isn’t random. It follows the smile line, traces the cuticle, or fills a specific shape on the nail. Even maximalist bedazzling has structure.
Photo-coded. These nails are built for Pinterest. Every angle catches light differently, which is why bedazzled nail content saves at 3x the rate of regular polish content.
The Bedazzling Rules
The line between “expensive bedazzled” and “looks like I attacked my nails with a glue gun” is thin. Here are the five rules that keep you on the right side.
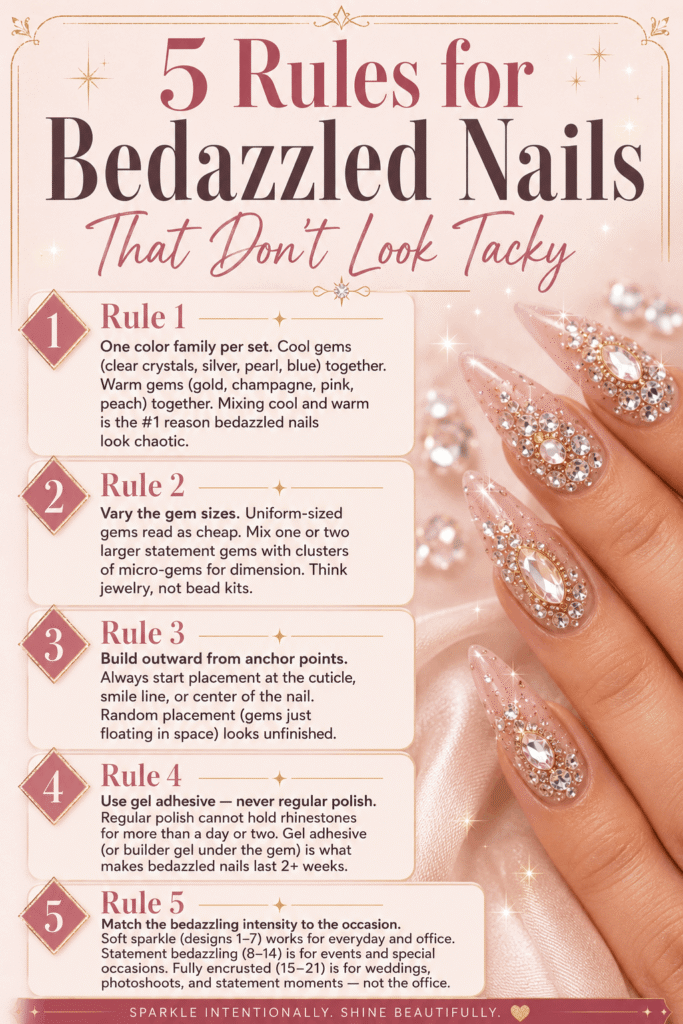
Rule 1: One color family per set. Cool gems (clear crystals, silver, pearl, blue) together. Warm gems (gold, champagne, pink, peach) together. Mixing cool and warm is the #1 reason bedazzled nails look chaotic.
Rule 2: Vary the gem sizes. Uniform-sized gems read as cheap. Mix one or two larger statement gems with clusters of micro-gems for dimension. Think jewelry, not bead kits.
Rule 3: Build outward from anchor points. Always start placement at the cuticle, smile line, or center of the nail. Random placement (gems just floating in space) looks unfinished.
Rule 4: Use gel adhesive — never regular polish. Regular polish cannot hold rhinestones for more than a day or two. Gel adhesive (or builder gel under the gem) is what makes bedazzled nails last 2+ weeks.
Rule 5: Match the bedazzling intensity to the occasion. Soft sparkle (designs 1–7) works for everyday and office. Statement bedazzling (8–14) is for events and special occasions. Fully encrusted (15–21) is for weddings, photoshoots, and statement moments — not the office.
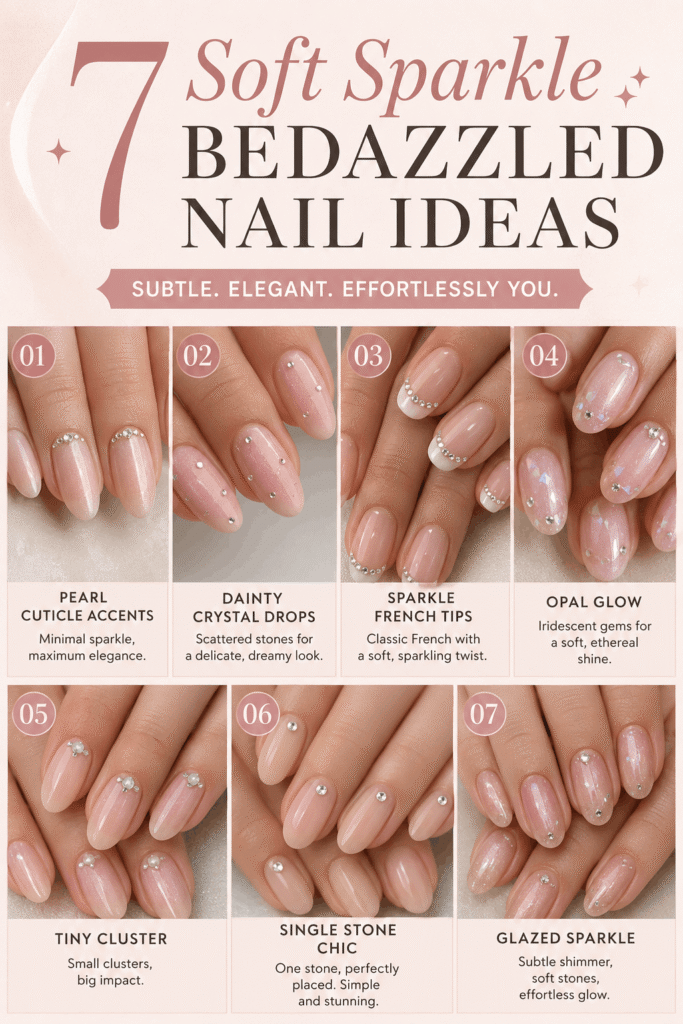
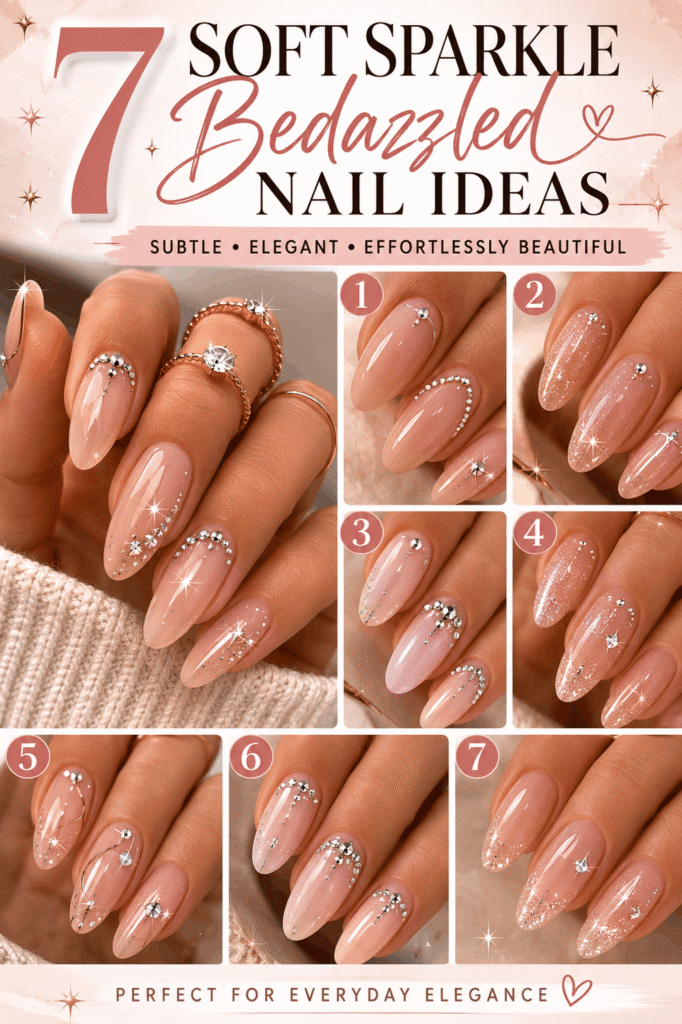
Soft Sparkle Designs
The entry-level bedazzled set. Gems used as accents — never the main event. Perfect for everyday wear, office settings, and anyone testing the bedazzled waters.
1. Single Cuticle Rhinestone Cluster
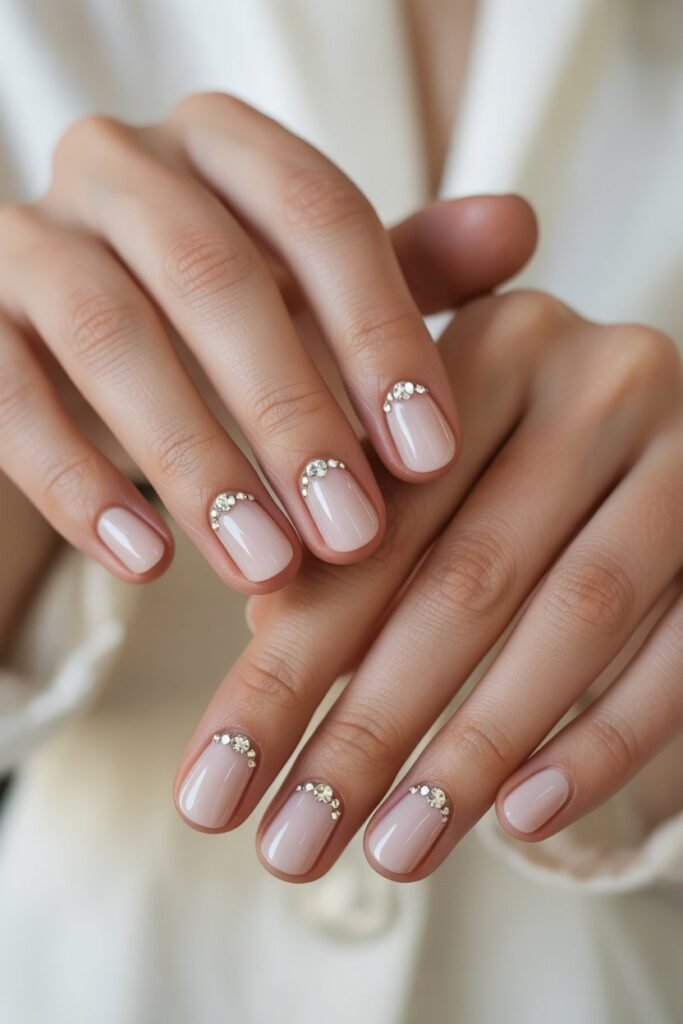
A clean polish base (nude, sheer pink, or milky white) with a cluster of 3–5 tiny rhinestones placed at the cuticle of each ring finger. Just enough sparkle to feel intentional.
Best for: Everyday wear, office, first-time bedazzlers.
Why it works: Cuticle placement keeps gems out of typing/wear zones.
Quick tip: Vary the gem sizes within the cluster — uniform sizes read flat.
2. Smile Line Gem Trim
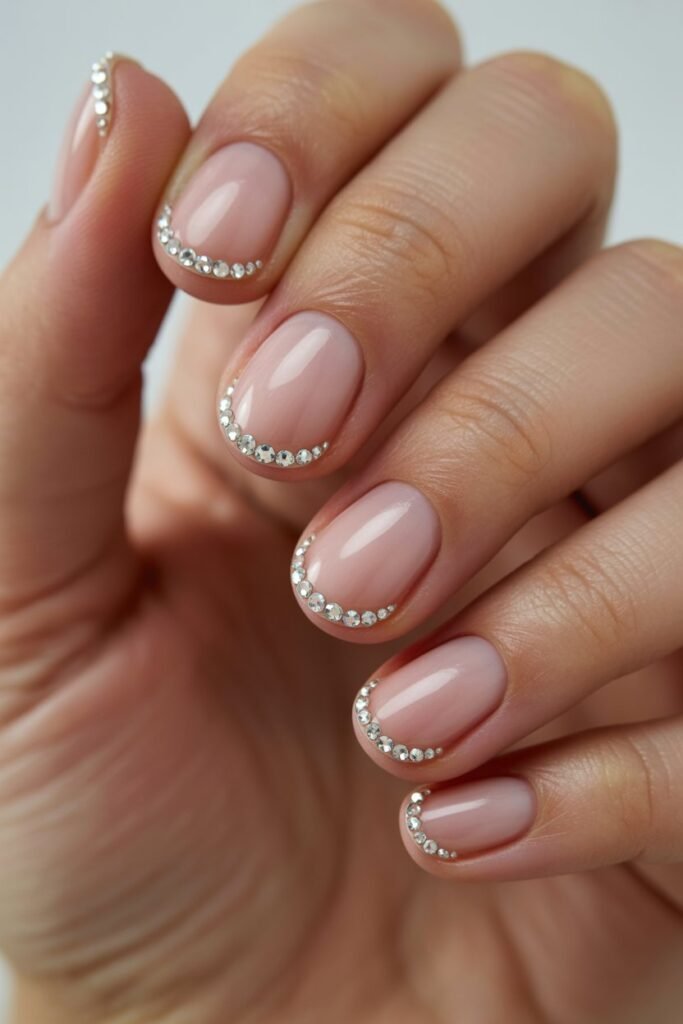
Classic french tip, except the smile line is traced entirely in tiny rhinestones instead of painted. The french tip elevated.
Best for: Brides, formal events, wedding guests.
Why it works: Bedazzled french tips are the most-saved bridal nail design on Pinterest.
Quick tip: Use micro-rhinestones (1–2mm) so the smile line still reads clean.
3. Side-Lined Gem Stripe
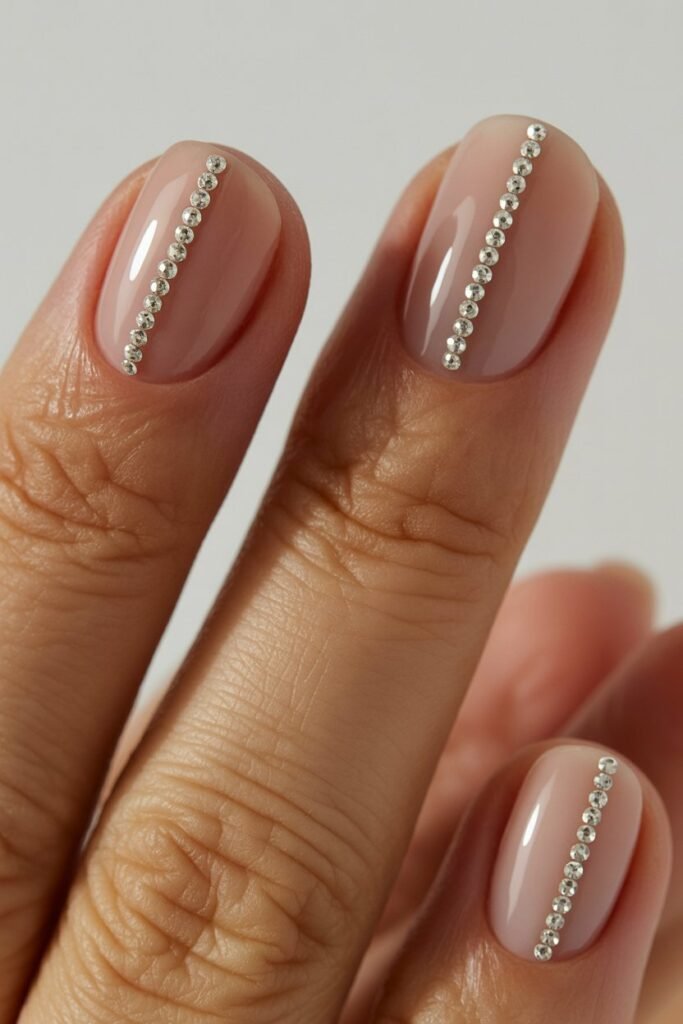
A vertical line of tiny rhinestones running down one side of each nail (not the smile line — the side edge). Subtle, editorial, looks like jewelry.
Best for: Special events, content creators, modern brides.
Why it works: Side-line placement is unexpected — that’s what makes it chic.
Quick tip: Place gems on the outer edge of each nail (away from the body) for the most flattering line.
4. Single Statement Gem Accent
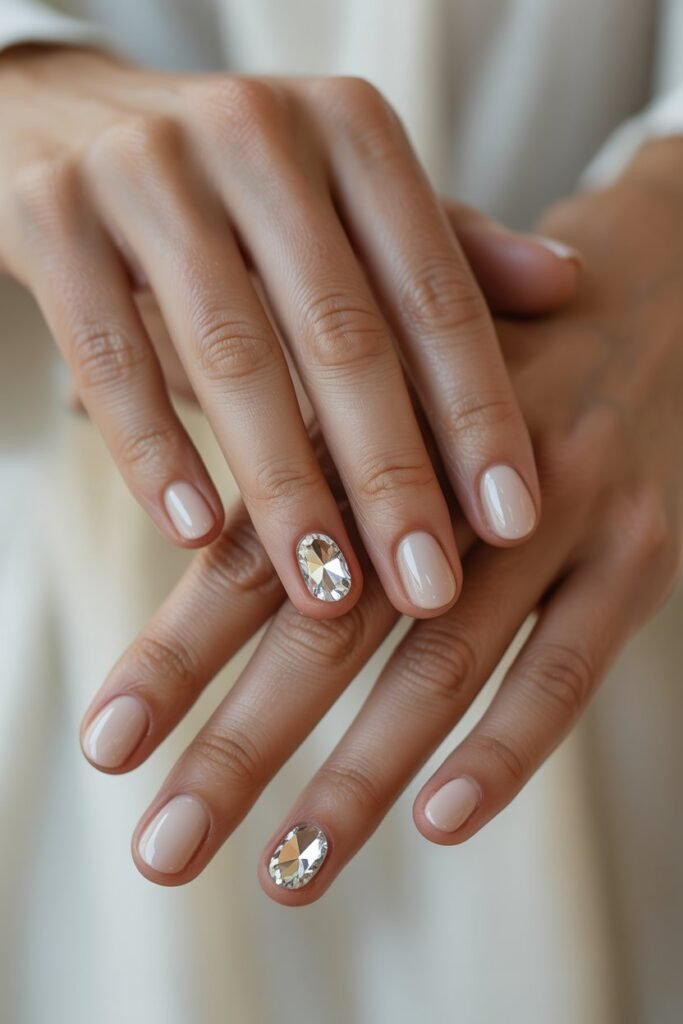
One large rhinestone or crystal placed at the cuticle of each ring finger, with the other 9 nails left polished but unadorned. Quietly luxurious.
Best for: Office days, dinners, low-key special occasions.
Why it works: One large gem reads as jewelry; multiple small ones can read as craft.
Quick tip: Pick a gem with multiple facets — flat-back stones reflect less light.
5. Micro-Pearl Trail
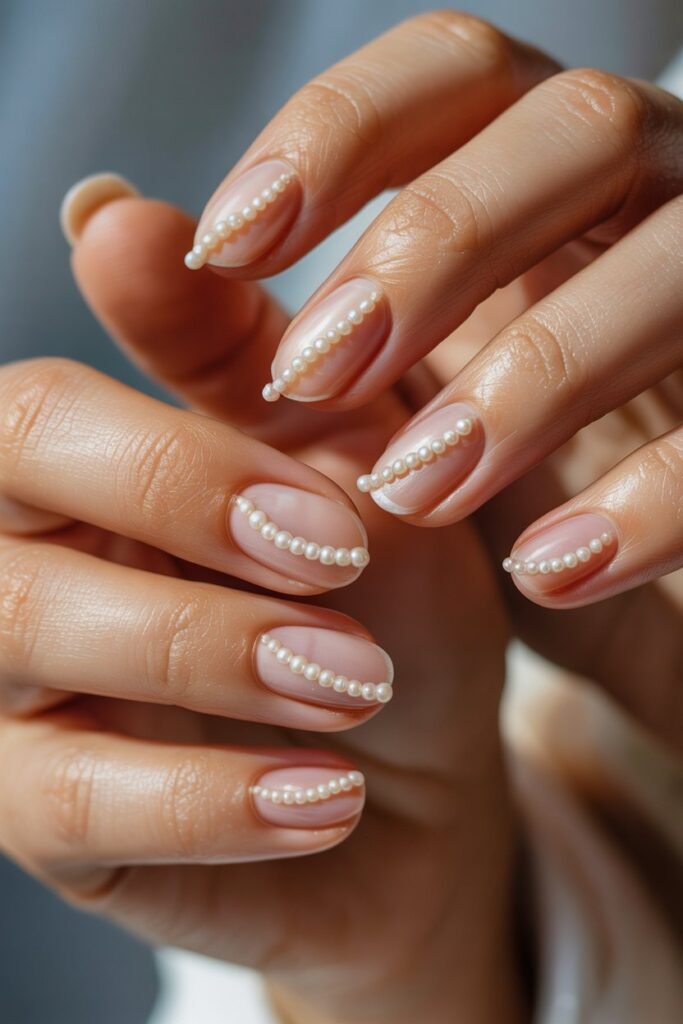
A delicate trail of micro-pearls flowing diagonally across each nail. Romantic, soft, photographs gorgeously in natural light.
Best for: Weddings, garden parties, brunches.
Why it works: Pearls are the safest bedazzled detail — they always read elegant.
Quick tip: Vary the spacing between pearls — perfectly uniform pearls read robotic.
6. Tip Edge Gem Border
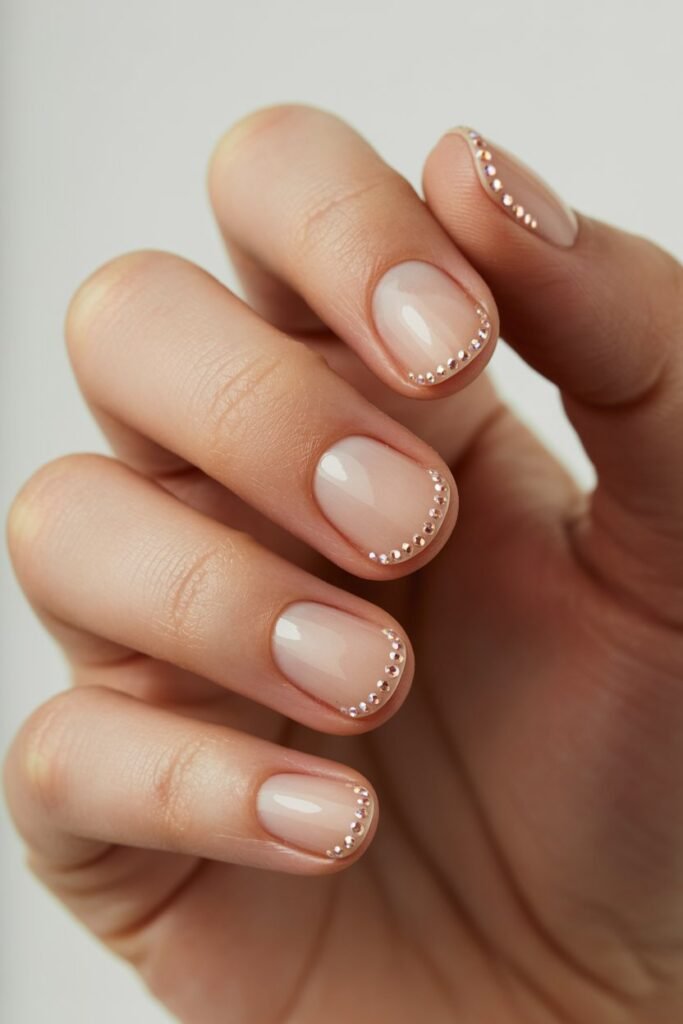
A single row of tiny rhinestones lining just the very edge of each tip. Soft sparkle, surprisingly comfortable for daily wear.
Best for: Everyday wear, casual events.
Why it works: Tip edge placement is subtle from a distance, sparkly up close.
Quick tip: Use micro-gems (under 1.5mm) — anything bigger gets caught on fabric.
7. Corner Cluster Accent
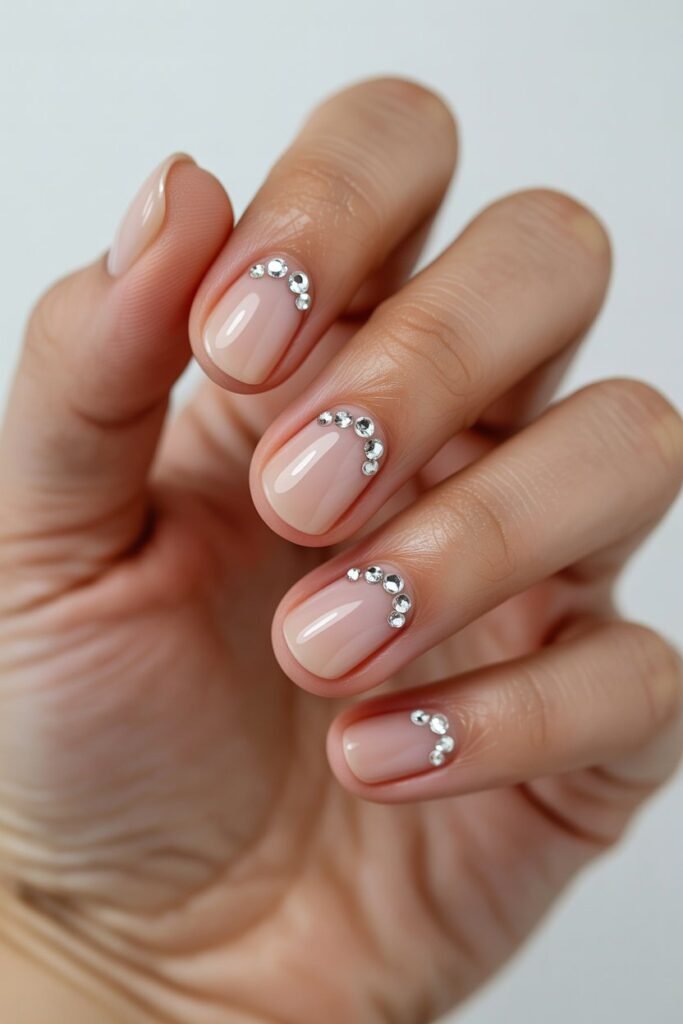
A small cluster of 4–6 rhinestones placed in one corner of each nail (usually the inner cuticle corner). Asymmetric, intentional, modern.
Best for: Office days, dates, modern aesthetics.
Why it works: Asymmetric placement reads as designed, not decorated.
Quick tip: Same corner on every nail — varying the corner placement looks accidental.
Statement Bedazzled Designs
Where bedazzling becomes the main design feature. These are event-ready, photo-ready, and built for moments where you want your nails to be noticed.
8. Full Cuticle-to-Tip Gem Stripe
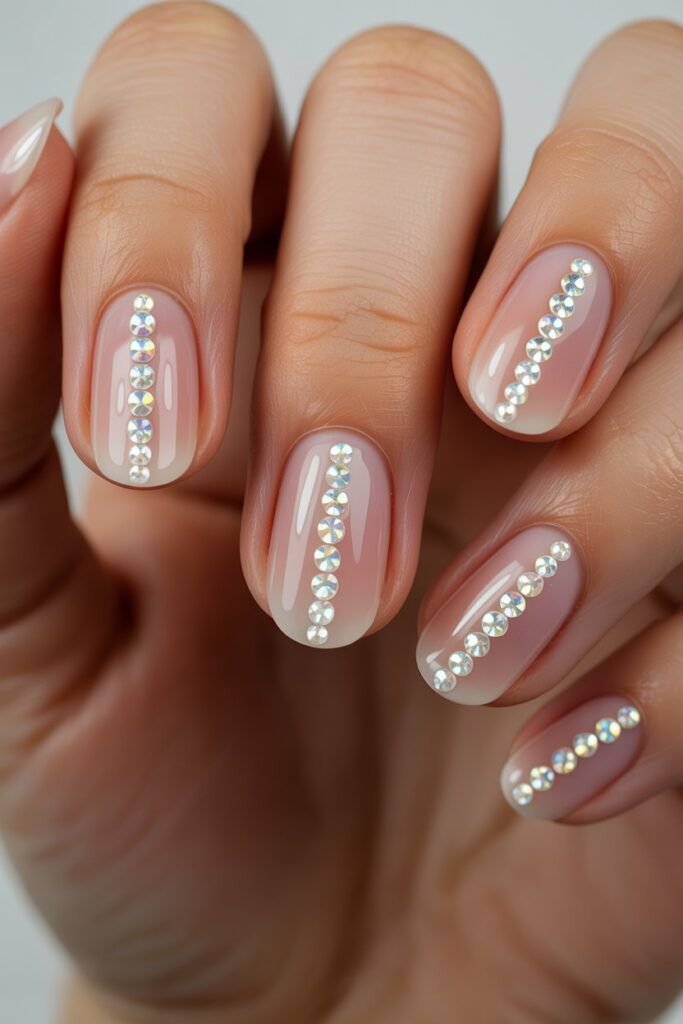
A vertical line of rhinestones running from the cuticle all the way to the tip, down the center of each nail. Striking, symmetric, photographs beautifully.
Best for: Concerts, parties, statement events.
Why it works: The vertical line elongates the nail visually.
Quick tip: Use a mix of gem sizes — larger at the cuticle, smaller toward the tip — for a tapered effect.
9. Half-Bedazzled French Tip
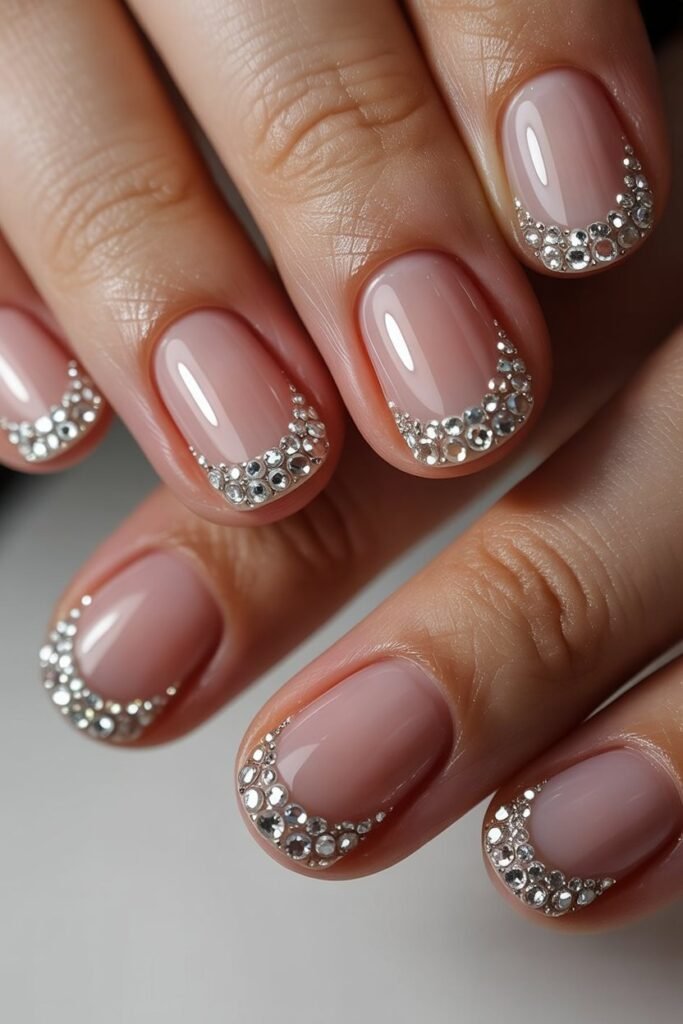
The tip half of each nail is fully covered in rhinestones; the bottom half stays bare or polished. Looks like jeweled lacquer.
Best for: Special events, weddings, photoshoots.
Why it works: The half-coverage gives bedazzled drama without overwhelming.
Quick tip: Use a flat-back micro-gem mixture so the tips don’t bulk too much.
10. Heart-Shaped Gem Cluster
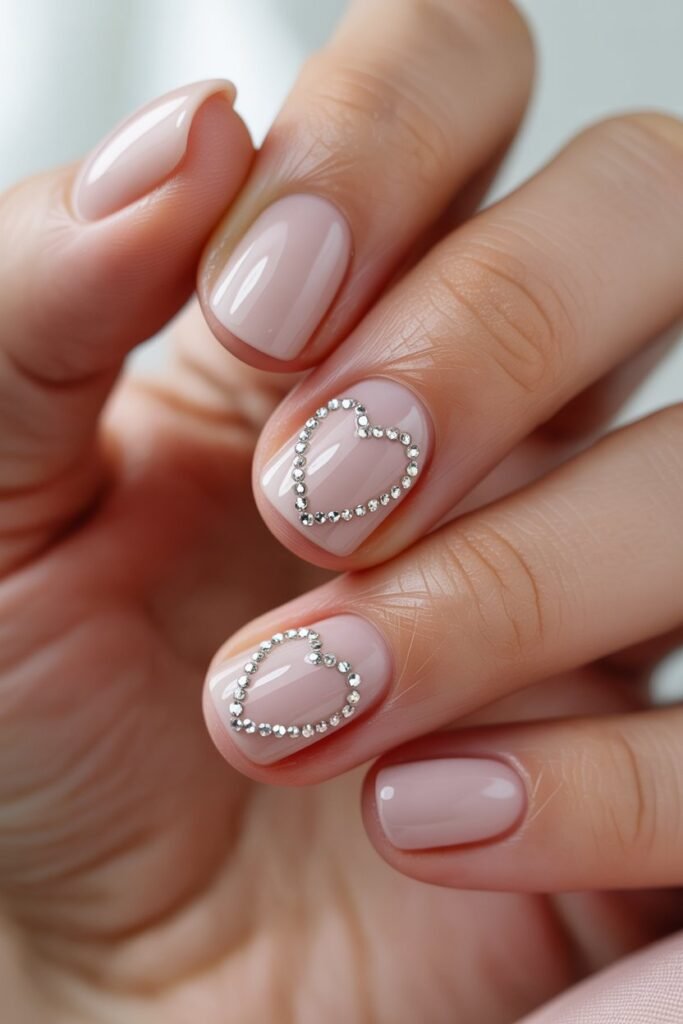
A small heart shape outlined in rhinestones on one or two accent nails, with the rest of the set in clean polish. Romantic, save-heavy on Pinterest.
Best for: Valentine’s, anniversaries, engagement photos.
Why it works: Hearts are universally photogenic; gems amplify the effect.
Quick tip: Outline the heart in pink gems on a sheer pink base for the softest version.
11. Pearl Cluster Accent Nail
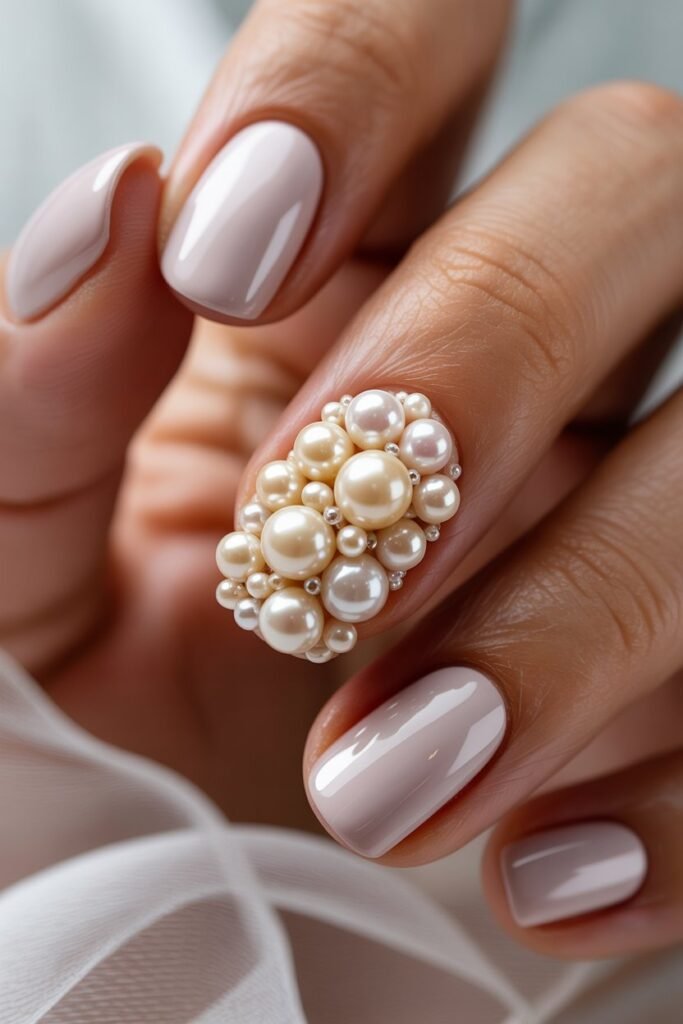
One accent nail completely covered in pearls (varying sizes, organic spacing), with the other nine nails kept minimal. The bridal showstopper.
Best for: Weddings, bridal showers, engagement parties.
Why it works: Full pearl accent nails are the most-saved bridal manicure design.
Quick tip: Mix pearl sizes — uniform pearl coverage reads flat; varied sizes look like jewelry.
12. Rhinestone V-Tip
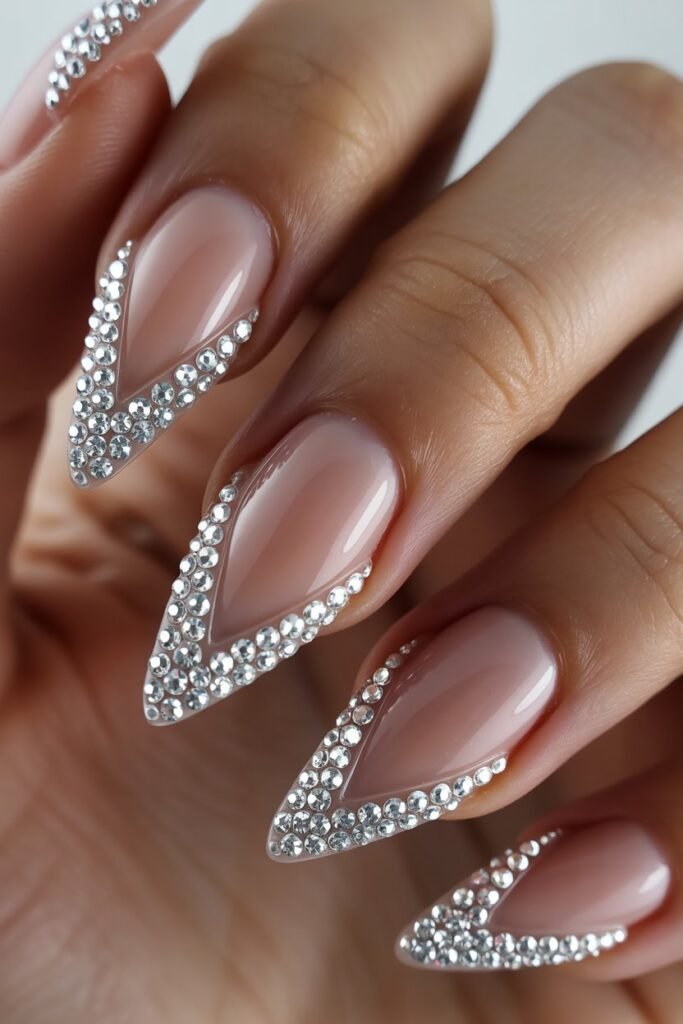
A V-shaped section at the tip of each nail completely filled with rhinestones. Sharp, modern, very 2026.
Best for: Modern brides, content creators, statement events.
Why it works: The V-shape gives bedazzling a graphic structure.
Quick tip: Keep the V shallow — deep V’s overwhelm shorter nails.
13. Diagonal Gem Sash
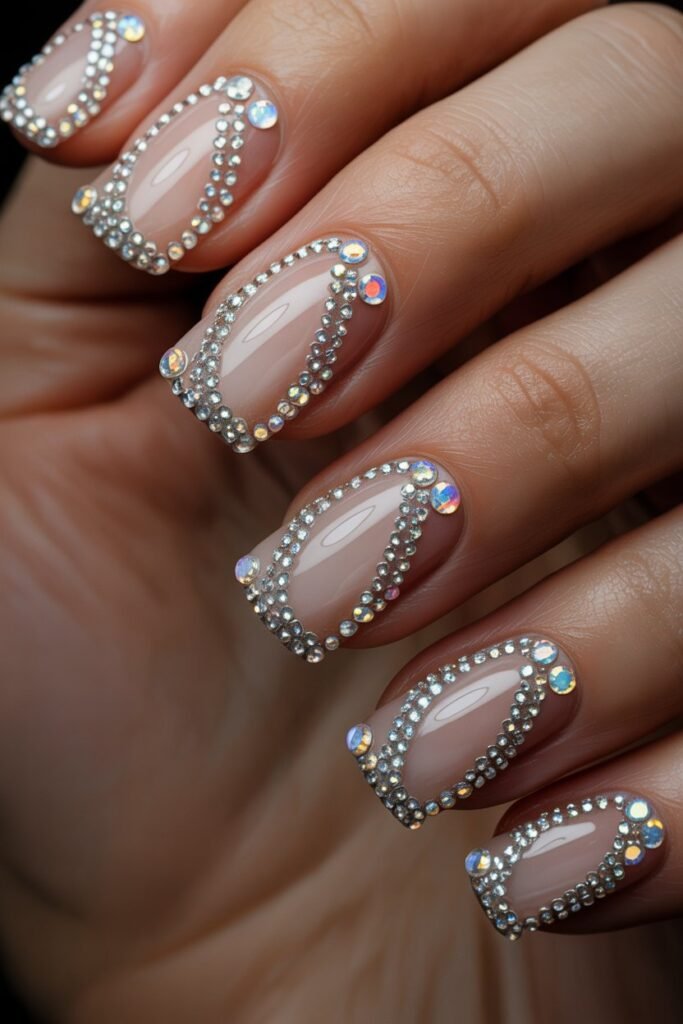
A diagonal line of rhinestones cutting across each nail at the same angle (think a sash on a gown). Editorial, unique, photographs unreal.
Best for: Photoshoots, content creation, statement nights.
Why it works: Diagonal lines are uniquely flattering — they elongate the nail shape.
Quick tip: Match the angle on every nail — varying angles reads as messy.
14. Floating Gemstone Garden
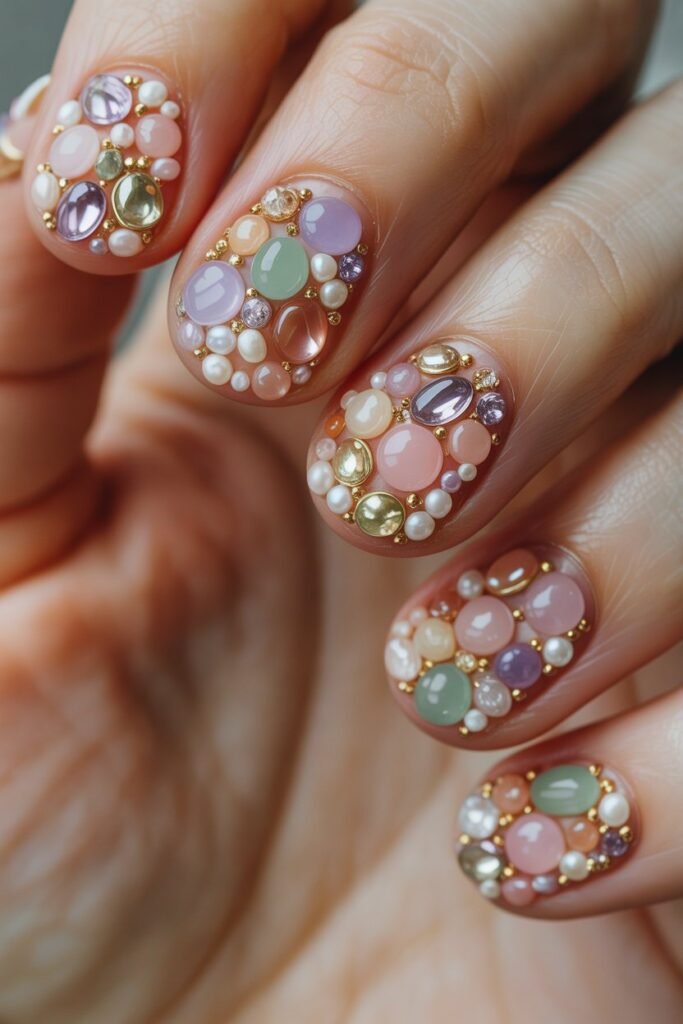
Multiple gems of different colors and sizes scattered across each nail in an “organic” placement (like flowers in a garden). Maximalist but soft.
Best for: Festivals, photoshoots, statement events.
Why it works: “Organic chaos” is the hardest bedazzled look to pull off — when it works, it’s stunning.
Quick tip: Stick to a 3-color palette even with mixed gems — full rainbow reads chaotic.
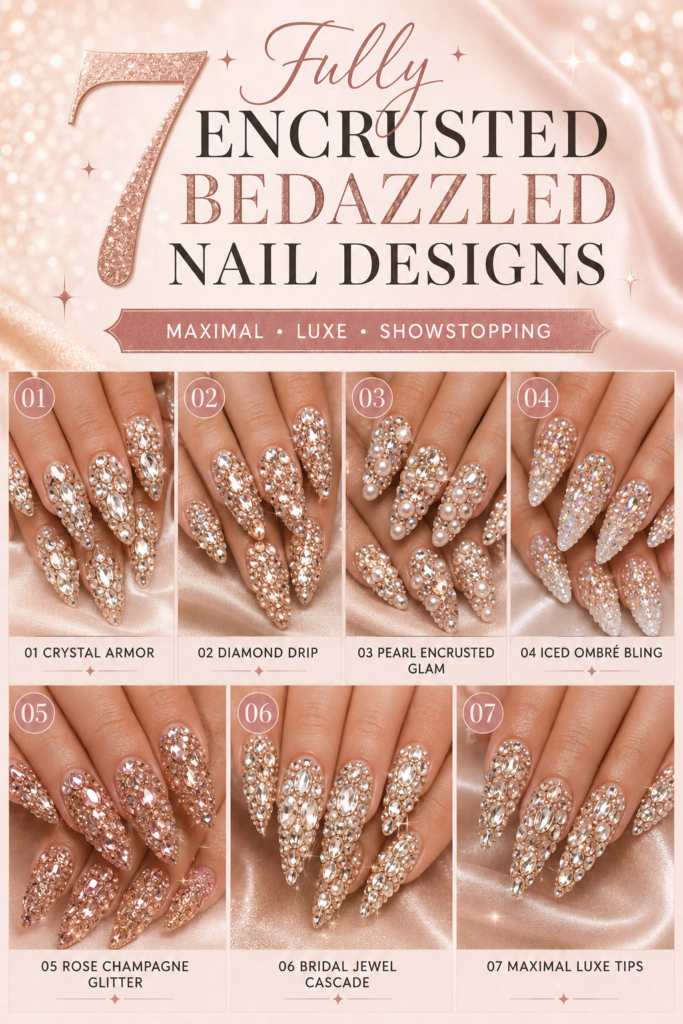
Fully Encrusted Designs
The maximalist tier. Every millimeter of nail is covered in gems, pearls, charms, or some combination. Built for weddings, photoshoots, and Pinterest viral moments.
15. All-Over Crystal Coverage
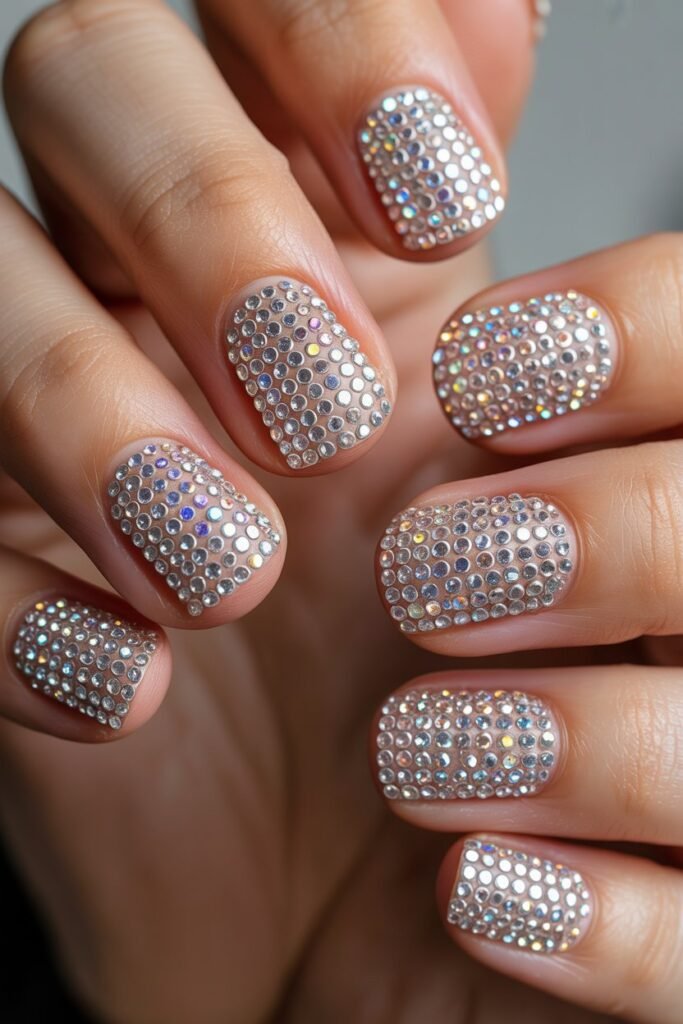
Every nail completely covered in clear crystals, packed tightly with no base color showing through. Like wearing diamonds.
Best for: Weddings, formal galas, photoshoots.
Why it works: Full crystal coverage is the most-photographed bedazzled design on Pinterest.
Quick tip: Use varied crystal sizes for dimension — uniform crystals can read plastic.
16. All-Over Pearl Manicure
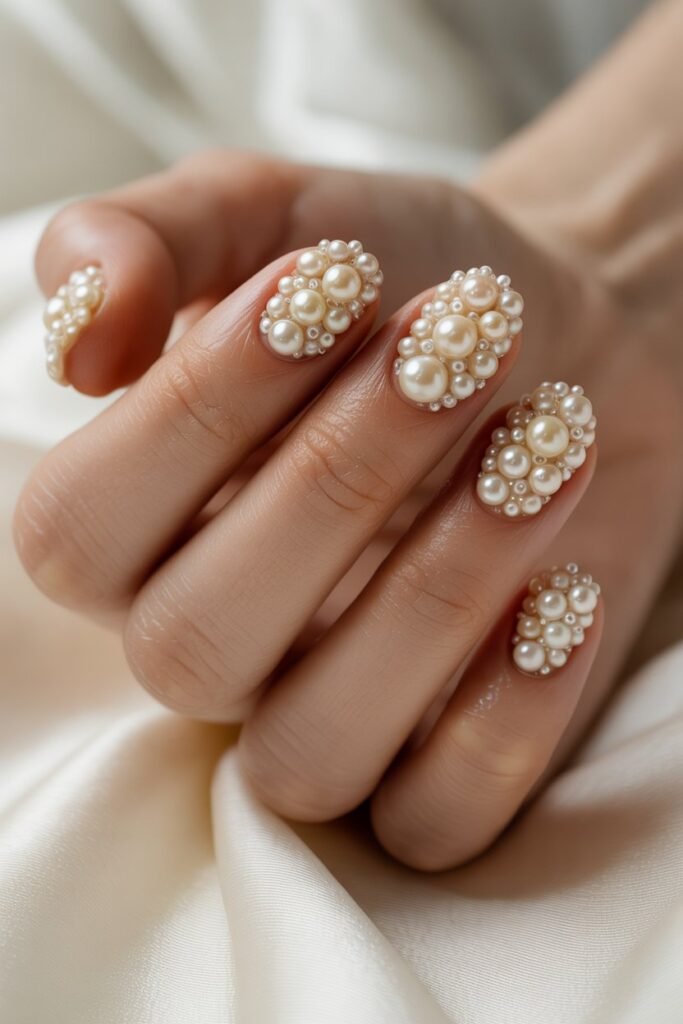
Every nail covered in pearls (white, cream, or champagne), varying sizes packed organically. The ultimate bridal nail look.
Best for: Weddings, bridal photography, formal events.
Why it works: Full pearl manicures photograph stunningly under any lighting.
Quick tip: Mix pearl finishes (matte, glossy, iridescent) for visual interest.
17. Mixed Gem Mosaic
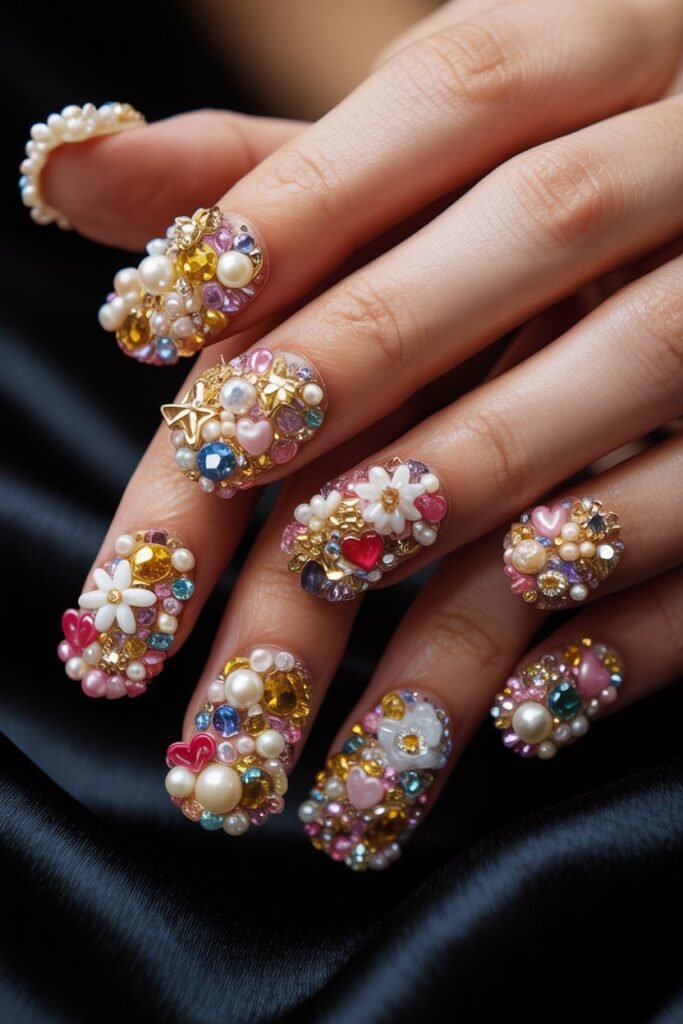
Every nail covered in a mosaic of different gems — pearls, crystals, gold beads, micro-charms. Maximum dimension, maximum drama.
Best for: Statement events, photoshoots, fashion moments.
Why it works: Mosaic placement reads as artistic, not chaotic.
Quick tip: Stick to a 3-element palette (e.g., pearls + clear crystals + gold beads only) for cohesion.
18. Chrome and Crystal Combo
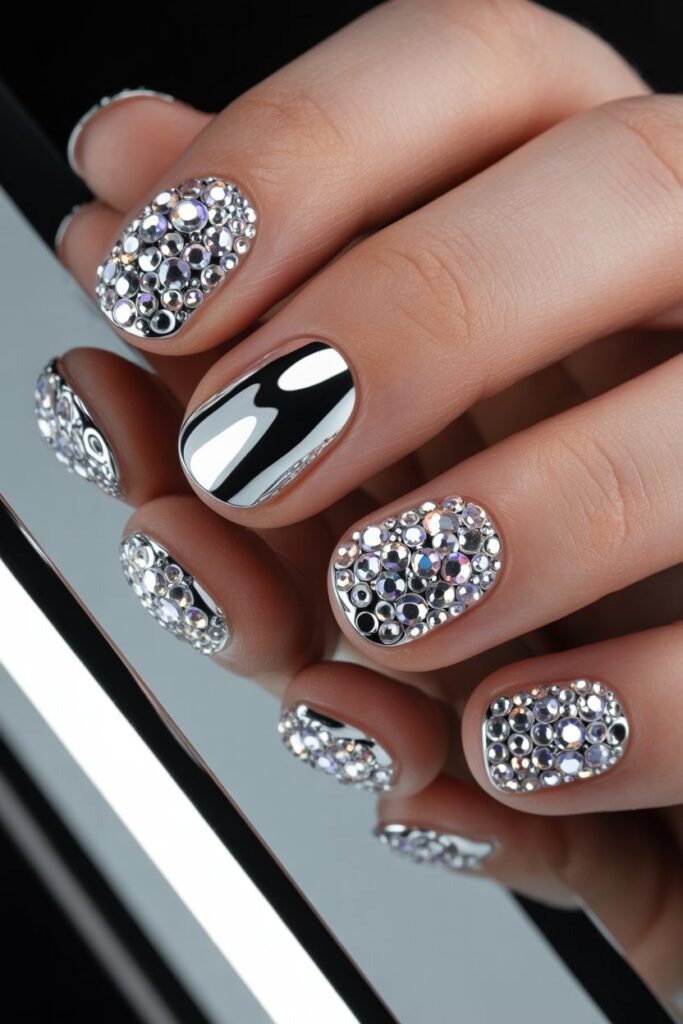
Every nail covered in alternating chrome powder finish and rhinestone clusters. Futuristic, editorial, very Nail TikTok.
Best for: Content creators, fashion events, photoshoots.
Why it works: Chrome + crystals catches more light than either alone.
Quick tip: Pearl chrome (not silver chrome) for the most flattering pair with clear crystals.
19. Tiered Pearl & Crystal Drop
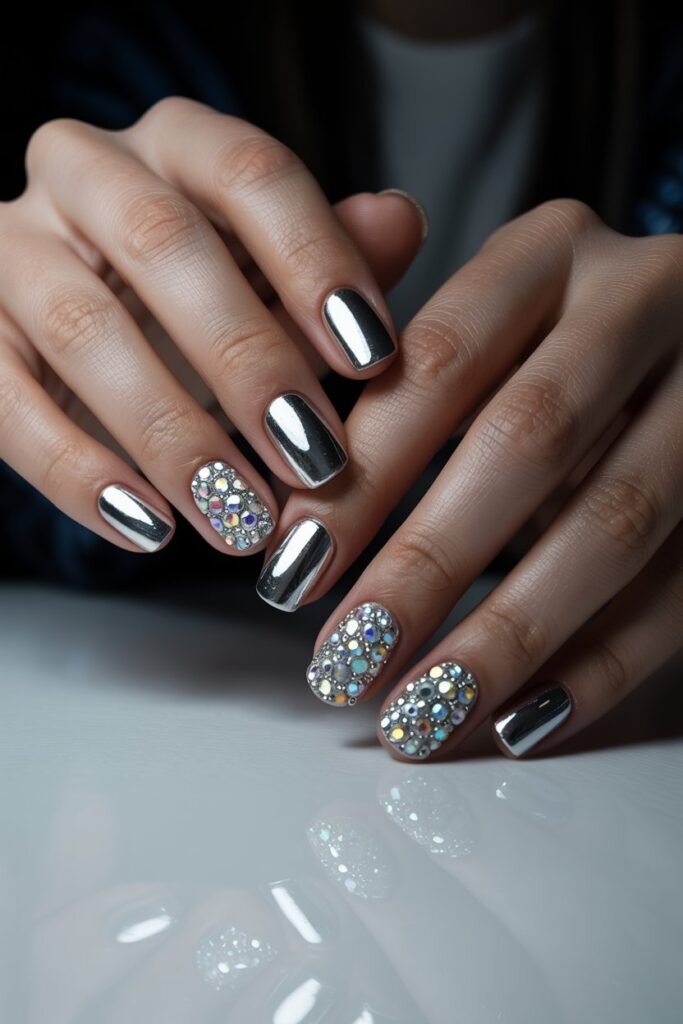
Pearls clustered at the cuticle, transitioning to crystals at the tip in a tiered drop effect. Like wearing chandelier earrings on your nails.
Best for: Formal weddings, photoshoots, statement nights.
Why it works: Tiered designs look like fine jewelry.
Quick tip: Use gel layering to build up the tiers — flat application loses the drop effect.
20. 3D Charm Encrusted
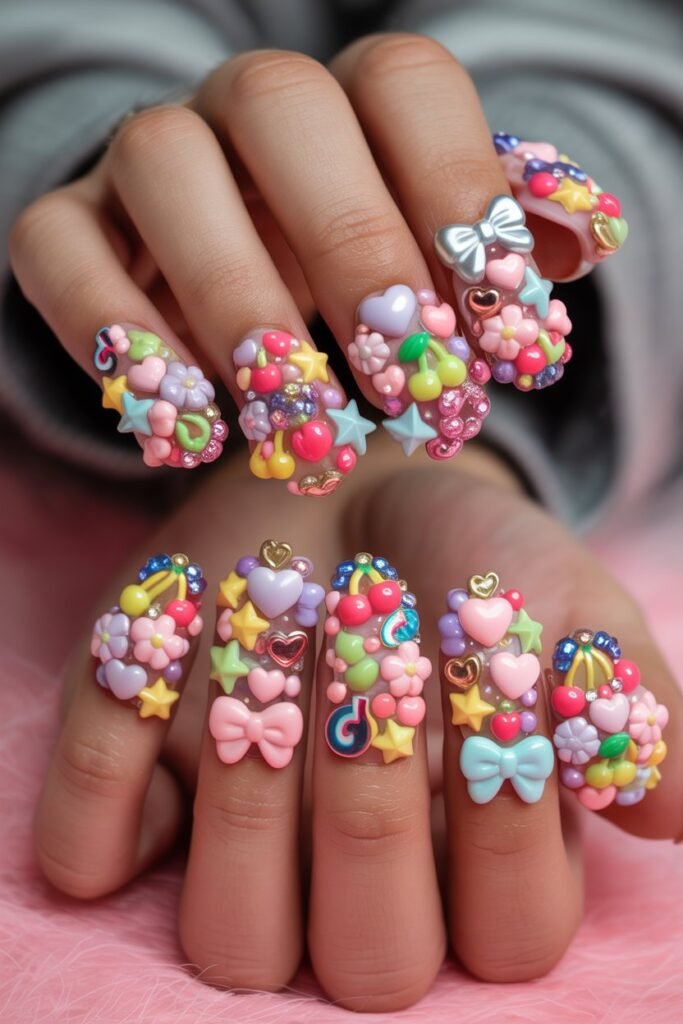
Every nail covered with 3D charms — hearts, bows, stars, flowers, fruits — in coordinated colors. Maximalist Nail TikTok favorite.
Best for: Content creation, statement events, photoshoots.
Why it works: 3D charms add physical dimension that gems alone can’t match.
Quick tip: Bigger charms on shorter nails, smaller charms on longer nails for proportion.
21. Custom-Painted + Encrusted Accent
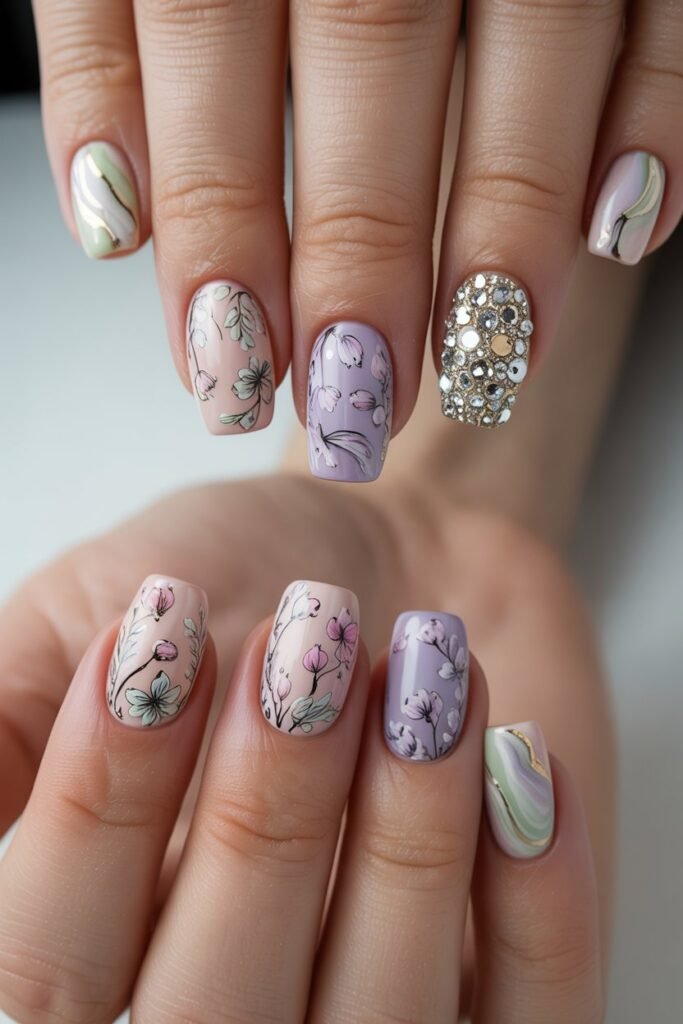
Hand-painted detailed design on 9 nails (florals, butterflies, marble) with one fully encrusted accent nail. The contrast piece.
Best for: Brides, photoshoots, statement events.
Why it works: One encrusted accent against detailed art creates the highest-impact contrast.
Quick tip: Match the gem color to one color in the painted design for cohesion.
Gem Types That Work Best
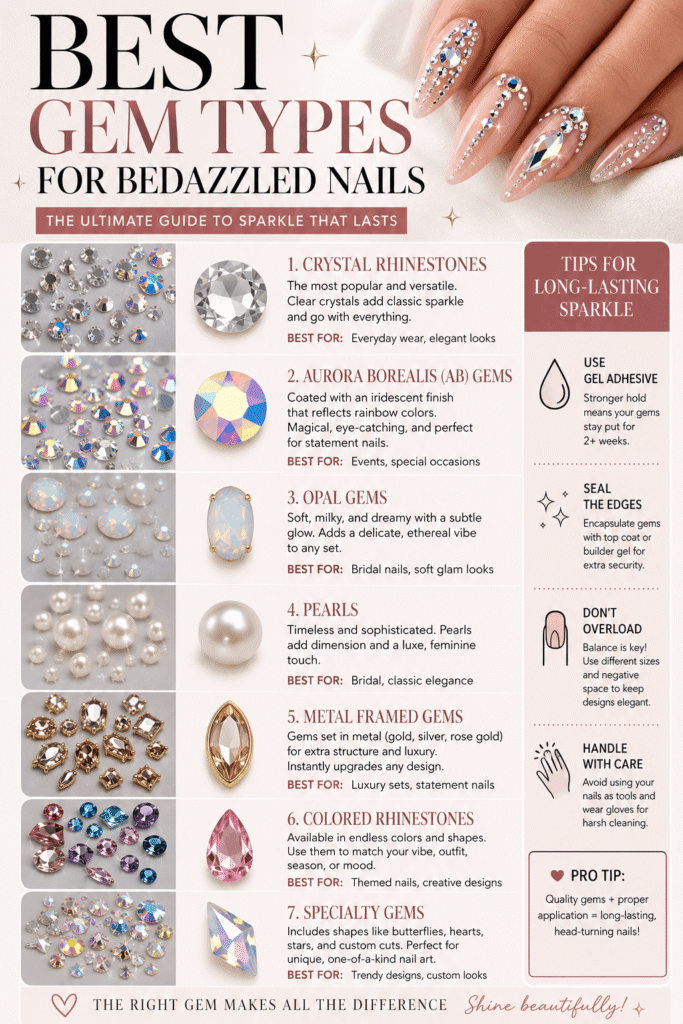
Not all gems are created equal. Here’s the cheat sheet on what to use when.
Flat-back rhinestones. The workhorse. Affordable, comfortable for daily wear, and stay flat against the nail. Best for everyday and soft sparkle designs.
Crystal rhinestones (Swarovski or dupe). Higher-quality crystals with multiple facets that catch more light. Worth the extra cost for statement and fully encrusted designs. Photograph dramatically better than flat-backs.
Pearls (flat-back or 3D). The most universally flattering gem. Works on every skin tone, photographs beautifully, reads as bridal or everyday depending on application. Mix sizes for dimension.
Chrome and metallic charms. 3D charms in gold, silver, or chrome finish. Best as accent elements, not full coverage (too heavy as full coverage).
Holographic gems. Color-shifting rhinestones that read different from every angle. Best for content creators and event nails — high-impact but trickier to coordinate.
Skip: plastic craft store gems (look cheap), oversized gems on shorter nails (proportionally wrong), and mixed-finish gems (matte + glossy + holographic) — pick one finish category.
How to DIY Bedazzled Nails (And Make Them Last)
The biggest reason DIY bedazzled nails fail is wrong adhesive. Here’s the actual method.
You need:
- Gel adhesive (or builder gel + UV/LED lamp)
- A wax pencil (picks up gems cleanly)
- Tweezers for placement
- Glossy top coat — multiple coats
- Your gem assortment
Step 1: Apply your base color and let dry completely. For gel base, cure fully before adding gems.
Step 2: Apply a tiny dot of gel adhesive where you want each gem. Less is more — too much adhesive bleeds around the gem.
Step 3: Use a wax pencil to pick up the gem, then place it on the adhesive. Press down gently with the back of the tweezers.
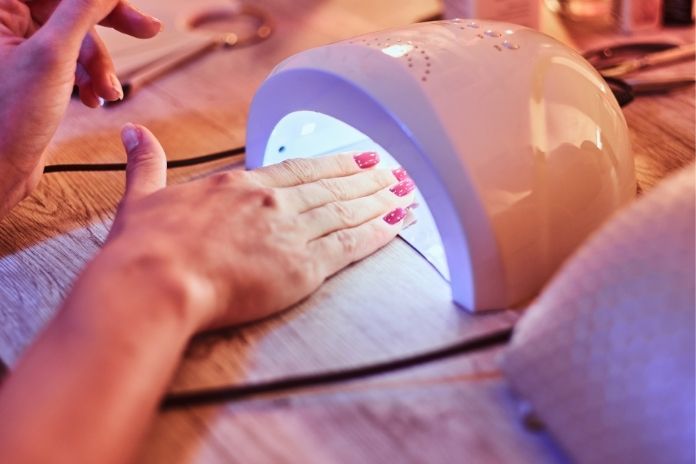
Step 4: Cure each gem placement under UV/LED light for 60 seconds (if using gel adhesive). This is what makes them last.
Step 5: Once all gems are placed and cured, apply a thin layer of glossy top coat over the gems to seal them. Cure again.
Step 6: Apply a second layer of top coat. Cure. The double top coat is what locks gems on for 2+ weeks.
For more on DIY nail art techniques and supply recommendations, Byrdie’s nail art guide covers everything from adhesive comparisons to gem placement tools.
FAQs
How long do bedazzled nails last?
With gel adhesive and proper top coat sealing, bedazzled nails last 2–3 weeks before gems start falling off. Regular polish + craft glue lasts 24–48 hours — not viable. The adhesive method is the entire difference between a 2-week set and a 2-day set.
Can you wash dishes and type with bedazzled nails?
With soft sparkle designs (1–7), yes — comfortable for daily activities. Statement designs (8–14) tolerate everyday wear but you’ll lose 1–2 gems by week 2. Fully encrusted designs (15–21) are not for daily wear — they’re event-only.
How do you remove bedazzled nails?
Never pick them off — you’ll damage the nail bed. Soak in acetone for 15–20 minutes to dissolve the adhesive, then gently slide gems off with an orange wood stick. For gel-based bedazzling, follow the standard gel removal process.
Are bedazzled nails worth the cost?
At the salon, full bedazzled sets typically run $80–$200 depending on complexity. For events, weddings, and photoshoots — absolutely worth it. For daily wear, soft sparkle (designs 1–7) at $40–$60 gives you the trend without the price. DIY can drop costs by 70%+ if you invest in supplies once.
What nail shape works best for bedazzled nails?
Almond and coffin shapes hold gems best — the flat surface area gives gems room to stay put. Square works for graphic bedazzling (V-tips, geometric placements). Avoid extreme stiletto (too narrow for gems) and very short round nails (gems overwhelm the nail).
Conclusion
Bedazzled nails are the answer if you’re bored of minimalism. They’re loud, they’re proud, they’re more is more — and Pinterest is showering bedazzled content with distribution right now.
Pick three designs from this list — one soft sparkle, one statement, one fully encrusted — and decide which version fits your life. Screenshot, save, and bring them to your nail tech (or your DIY kit).
![7 Best Liquid Latex for Nails [2026 Review]](https://magicalassam.com/review/wp-content/uploads/2022/05/Best-Liquid-Latex-for-Nails.jpg)